确保你的环境已针对使用 Bicep 文件进行设置。 若要创作和部署 Bicep 文件,建议使用以下任意选项:
| 任务 | 选项 | Bicep CLI 安装 |
|---|---|---|
| 作者 | VS Code 和 Bicep 扩展 | automatic |
| Visual Studio 和 Bicep 扩展 | automatic | |
| 部署 | Azure CLI | automatic |
| Azure PowerShell | 手动 | |
| VS Code 和 Bicep 扩展 | 手动 | |
| 气隙云 | 下载 |
警告
Bicep CLI 在模拟环境中的稳定性无法得到保证,因为 Rosetta2 和 QEMU 等模拟工具通常无法完美模拟该体系结构。
Visual Studio 代码和 Bicep 扩展
若要创建 Bicep 文件,需要一个很好的 Bicep 编辑器。 我们建议:
Visual Studio Code - 如果尚未安装 Visual Studio Code,请安装。
用于 Visual Studio Code 的 Bicep 扩展。 装有 Bicep 扩展的 Visual Studio Code 提供语言支持和资源自动完成功能。 该扩展有助于你创建和验证 Bicep 文件。
要安装该扩展,请在“扩展”选项卡或 Visual Studio Marketplace 中搜索“bicep”。
选择“安装” 。
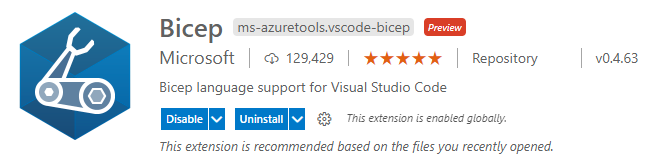
要验证是否已安装该扩展,请打开任何文件扩展名为 .bicep 的文件。 在右下角,应该会看到语言模式更改为 Bicep。

如果在安装过程中出现错误,请参阅排查 Bicep 安装问题。
可以直接从 VS Code 编辑器部署 Bicep 文件。 有关详细信息,请参阅从 Visual Studio Code 部署 Bicep 文件。
配置 Bicep 扩展
若要查看设置,请执行以下操作:
从
View菜单中选择Extensions。从扩展列表中选择
Bicep。选择
FEATURE CONTRIBUTIONS选项卡: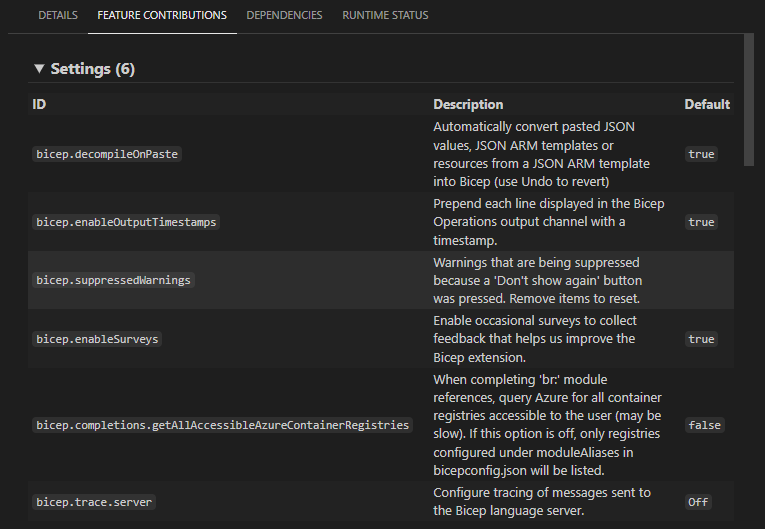
Bicep 扩展具有以下设置和默认值:
ID 默认值 说明 bicep.decompileOnPaste 是 自动将粘贴的 JSON 值、JSON ARM 模板或资源从 JSON ARM 模板转换为 Bicep(使用“撤销”命令进行还原)。 有关详细信息,请参阅粘贴为 Bicep。 bicep.enableOutputTimestamps 是 在“Bicep 操作”输出通道中显示的每一行前面加上时间戳。 bicep.suppressedWarnings 由于用户按下了“不再显示”按钮而被禁止显示的警告。 删除要重置的项。 bicep.enableSurveys 是 启用不定期调查以收集反馈,从而帮助我们改进 Bicep 扩展。 bicep.completions.getAllAccessibleAzureContainerRegistries false 完成“br:”模块引用后,查询 Azure 以获取用户可访问的所有容器注册表(可能会很慢)。 如果关闭此选项,则仅列出在 bicepconfig.json 中的 moduleAliases 下配置的注册表。 bicep.trace.server 关闭 配置对发送到 Bicep 语言服务器的消息的跟踪。
如果要配置设置,请执行以下操作:
从“文件”
File菜单,选择“新建”Preferences,然后选择“项目”Settings。展开
Extensions,然后选择Bicep: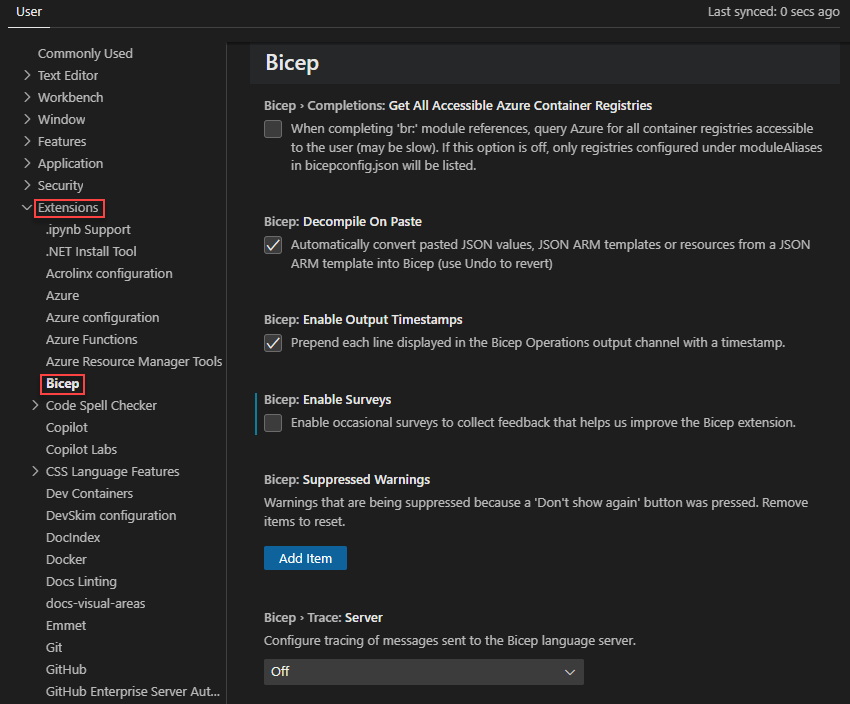
Visual Studio 和 Bicep 扩展
若要从 Visual Studio 创作 Bicep 文件,需要:
- Visual Studio - 如果你还没有 Visual Studio,请安装它。
- 用于 Visual Studio 的 Bicep 扩展。 带 Bicep 扩展的 Visual Studio 提供了语言支持和资源自动完成功能。 该扩展有助于你创建和验证 Bicep 文件。 从 Visual Studio Marketplace 安装扩展。
若要演练教程,请参阅快速入门:使用 Visual Studio 创建 Bicep 文件
Azure CLI
将 Azure CLI 与 Bicep 配合使用时,你具有部署和反向编译 Bicep 文件所需的一切。 在执行需要 Bicep CLI 的命令时,Azure CLI 会自动安装 Bicep CLI。
必须安装 Azure CLI 2.20.0 或更高版本。 要安装或更新 Azure CLI,请参阅:
要验证当前的版本,请运行:
az --version
若要验证 Bicep CLI 安装,请使用:
az bicep version
要升级到最新版本,请使用:
az bicep upgrade
有关更多命令,请参阅 Bicep CLI。
重要
Azure CLI 安装独立的 Bicep CLI 实例。 此实例不会与你手动安装的任何版本发生冲突。 Azure CLI 不会将 Bicep CLI 添加到你的路径。
已完成设置 Bicep 环境。 本文的余下内容介绍使用 Azure CLI 时不需要执行的安装步骤。
Azure PowerShell
必须安装 Azure PowerShell 5.6.0 或更高版本。 要更新或安装 Azure PowerShell,请参阅安装 Azure PowerShell。
Azure PowerShell 不会自动安装 Bicep CLI。 你必须手动安装 Bicep CLI。
重要
Azure CLI 安装的 Bicep CLI 的独立实例不适用于 PowerShell 命令。 如果你没有手动安装 Bicep CLI,Azure PowerShell 部署将失败。
手动安装 Bicep CLI 时,请使用 bicep 语法运行 Bicep 命令,不要使用 Azure CLI 的 az bicep 语法。
要检查你的 Bicep CLI 版本,请运行:
bicep --version
手动安装
以下方法安装 Bicep CLI 并将其添加到你的路径。 对于 Azure CLI 以外的任何用途,必须手动安装。
手动安装时,请选择一个与 Azure CLI 管理的位置不同的位置。 以下所有示例使用名为 biicep 或 .bicep 的位置。 此位置不会与 Azure CLI 管理的位置冲突,后者使用 .azure。
Linux
# Fetch the latest Bicep CLI binary
curl -Lo bicep https://github.com/Azure/bicep/releases/latest/download/bicep-linux-x64
# Mark it as executable
chmod +x ./bicep
# Add bicep to your PATH (requires admin)
sudo mv ./bicep /usr/local/bin/bicep
# Verify you can now access the 'bicep' command
bicep --help
# Done!
注意
对于像 Alpine 这样的轻量级 Linux 分发版,请在前面的脚本中使用 bicep-linux-musl-x64,而不是 bicep-linux-x64。
macOS
通过 homebrew
# Add the tap for bicep
brew tap azure/bicep

# Install the tool
brew install bicep
通过 BASH
# Fetch the latest Bicep CLI binary
curl -Lo bicep https://github.com/Azure/bicep/releases/latest/download/bicep-osx-x64
# Mark it as executable
chmod +x ./bicep
# Add Gatekeeper exception (requires admin)
sudo spctl --add ./bicep
# Add bicep to your PATH (requires admin)
sudo mv ./bicep /usr/local/bin/bicep
# Verify you can now access the 'bicep' command
bicep --help
# Done!
注意
Bicep CLI 0.16.X 或更高版本的安装不需要 Gatekeeper 例外。 不过,Bicep CLI 的夜间生成仍然需要例外。
Windows
Windows Installer
下载并运行最新的 Windows 安装程序。 该安装程序不需要管理权限。 安装完成后,会将 Bicep CLI 添加到用户路径。 关闭并重新打开任何打开的命令 shell 窗口,以使路径更改生效。
Chocolatey
choco install bicep
Winget
winget install -e --id Microsoft.Bicep
通过 PowerShell 手动
# Create the install folder
$installPath = "$env:USERPROFILE\.bicep"
$installDir = New-Item -ItemType Directory -Path $installPath -Force
$installDir.Attributes += 'Hidden'
# Fetch the latest Bicep CLI binary
(New-Object Net.WebClient).DownloadFile("https://github.com/Azure/bicep/releases/latest/download/bicep-win-x64.exe", "$installPath\bicep.exe")
# Add bicep to your PATH
$currentPath = (Get-Item -path "HKCU:\Environment" ).GetValue('Path', '', 'DoNotExpandEnvironmentNames')
if (-not $currentPath.Contains("%USERPROFILE%\.bicep")) { setx PATH ($currentPath + ";%USERPROFILE%\.bicep") }
if (-not $env:path.Contains($installPath)) { $env:path += ";$installPath" }
# Verify you can now access the 'bicep' command.
bicep --help
# Done!
在气隙云中安装
bicep install 和 bicep upgrade 命令无法在气隙环境中使用。 若要在气隙环境中安装 Bicep CLI,需要手动下载 Bicep CLI 可执行文件并将其保存到 .azure/bin。 此位置是 Azure CLI 管理的实例所要安装到的位置。
Linux
- 在非气隙环境中,从 Bicep 发布页下载 bicep-linux-x64。
- 将可执行文件复制到气隙计算机上的 $HOME/.azure/bin 目录中。 将文件重命名为 bicep。
macOS
- 在非气隙环境中,从 Bicep 发布页下载 bicep-osx-x64。
- 将可执行文件复制到气隙计算机上的 $HOME/.azure/bin 目录中。 将文件重命名为 bicep。
Windows
- 在非气隙环境中,从 Bicep 发布页下载 bicep-win-x64.exe。
- 将可执行文件复制到气隙计算机上的 %UserProfile%/.azure/bin 目录中。 将文件重命名为 bicep.exe。
在气隙云上使用 Azure CLI 任务时,必须将任务的 useGlobalConfig 属性设置为 true。 默认值为 false。 有关示例,请参阅使用 Azure Pipelines 和 Bicep 文件的 CI/CD。
安装每日版
如果要在发布之前尝试最新的预发行版 Bicep,请参阅安装每日版。
警告
这些预发布版本更有可能存在已知或未知 bug。
后续步骤
有关使用 Visual Studio Code 和 Bicep 扩展的详细信息,请参阅快速入门:使用 Visual Studio Code 创建 Bicep 文件。
如果在 Bicep 安装期间遇到问题,请参阅排查 Bicep 安装问题。
若要从 Azure 管道部署 Bicep 文件,请参阅将 Bicep 与 Azure Pipelines 集成。 若要通过 GitHub Actions 部署 Bicep 文件,请参阅通过使用 GitHub Actions 来部署 Bicep 文件。