在本快速入门中,你将使用 azure-messaging-servicebus 包编写 Java 代码,将消息发送到 Azure Service Bus 的主题,然后从该主题的订阅中接收消息。
注意
本快速入门提供有关将一批消息发送到Service Bus主题并从主题订阅接收这些消息的简单方案的分步说明。 可以在 GitHub上的Azure SDK for Java 存储库中找到用于Azure Service Bus的预构建Java示例。
提示
如果要在 Spring 应用程序中使用Azure Service Bus资源,建议将 Spring Cloud Azure 视为替代方法。 Spring Cloud Azure 是一个开源项目,它提供与 Azure 服务的无缝 Spring 集成。 若要详细了解 Spring Cloud Azure,并查看使用 Service Bus 的示例,请参阅 spring Cloud Stream with Azure Service Bus。
先决条件
- Azure订阅。 若要完成本教程,需要一个Azure帐户。 可以激活 Visual Studio 或 MSDN 订阅者权益或注册 trial 订阅。
- 安装 Azure SDK for Java。 如果使用 Eclipse,可以安装包含 Java Azure SDK 的 Azure Toolkit for Eclipse。 然后,可以将Microsoft Azure Java 库添加到项目中。 如果使用 IntelliJ,请参阅 安装用于 IntelliJ 的 Azure 工具包。
在 Azure 门户中创建命名空间
若要开始在Azure中使用Service Bus消息传送实体,请创建名称在Azure中唯一的命名空间。 命名空间为应用程序中Service Bus资源(如队列和主题)提供范围容器。
创建命名空间:
登录到 Azure 门户。
从左上角选择浮出控件菜单,然后转到“ 所有服务 ”页。
在左侧导航栏上,选择 “集成”。
向下滚动到 Messaging services,将鼠标悬停在 Service Bus 上,然后选择 Create。
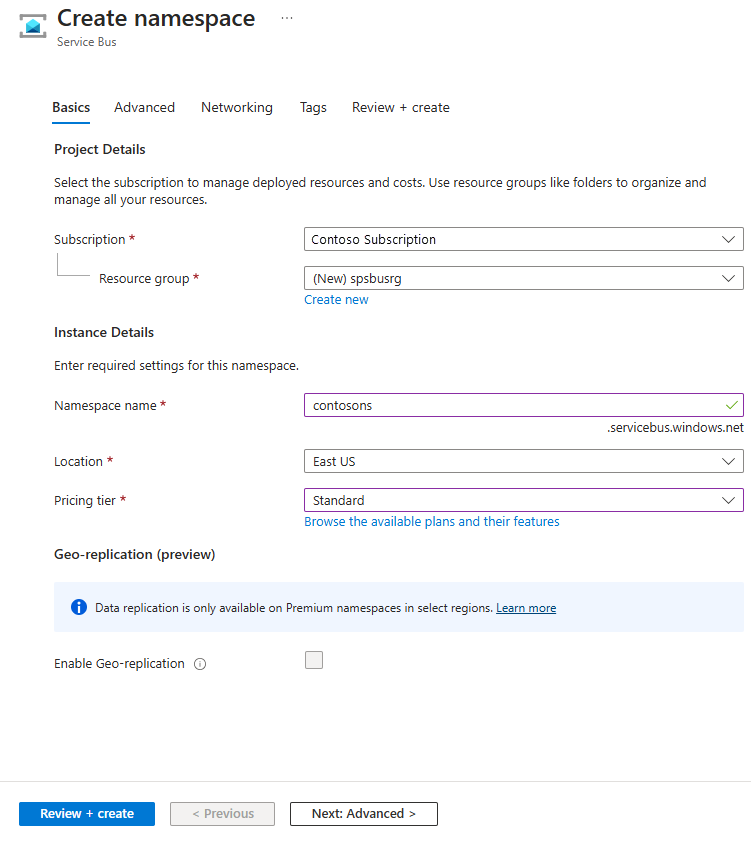
屏幕截图显示选择“创建资源”、“集成”,然后在菜单中选择“服务总线”。 在“创建命名空间”页的“基本信息”选项卡中,执行以下步骤:
对于Subscription,请选择要用来创建命名空间的 Azure 订阅。
对于资源组,选择现有资源组或创建新的资源组。
输入符合以下命名约定的 命名空间名称 :
- 名称在Azure中必须唯一。 系统会立即检查该名称是否可用。
- 名称长度最少为 6 个字符,最多为 50 个字符。
- 名称只能包含字母、数字和连字符
-。 - 名称必须以字母开头,并且必须以字母或数字结尾。
- 名称不以
-sb或-mgmt结尾。
对于 “位置”,请选择要托管命名空间的区域。
对于“定价层”,请选择命名空间的定价层(“基本”、“标准”或“高级”)。 对于本快速入门,请选择“标准”。
如果选择 高级 层,可以为命名空间启用 异地复制 。 异地复制功能可确保命名空间的元数据和数据从主要区域持续复制到一个或多个次要区域。
重要
若要使用主题和订阅,请选择“标准”或“高级”。 基本定价层不支持主题和订阅。
如果选择了“高级”定价层,请指定“消息传送单元”数。 高级层在 CPU 和内存级别提供资源隔离,使每个工作负荷在隔离的环境中运行。 此资源容器称为 消息传送单元。 高级命名空间至少具有一个消息传送单元。 可以为每个Service Bus高级命名空间选择 1、2、4、8 或 16 个消息传送单元。 有关详细信息,请参阅Service Bus高级消息传送层。
在页面底部选择查看 + 创建。
在 “审阅 + 创建 ”页上,查看设置,然后选择“ 创建”。
部署资源成功后,在部署页上选择 “转到资源 ”。
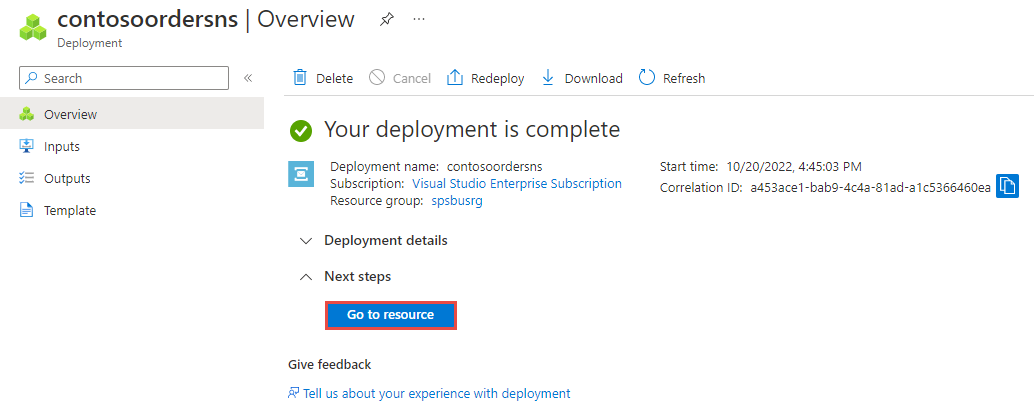
将会看到服务总线命名空间的主页。
Screenshot 显示 Service Bus 命名空间已创建的主页。


使用 Azure 门户创建主题
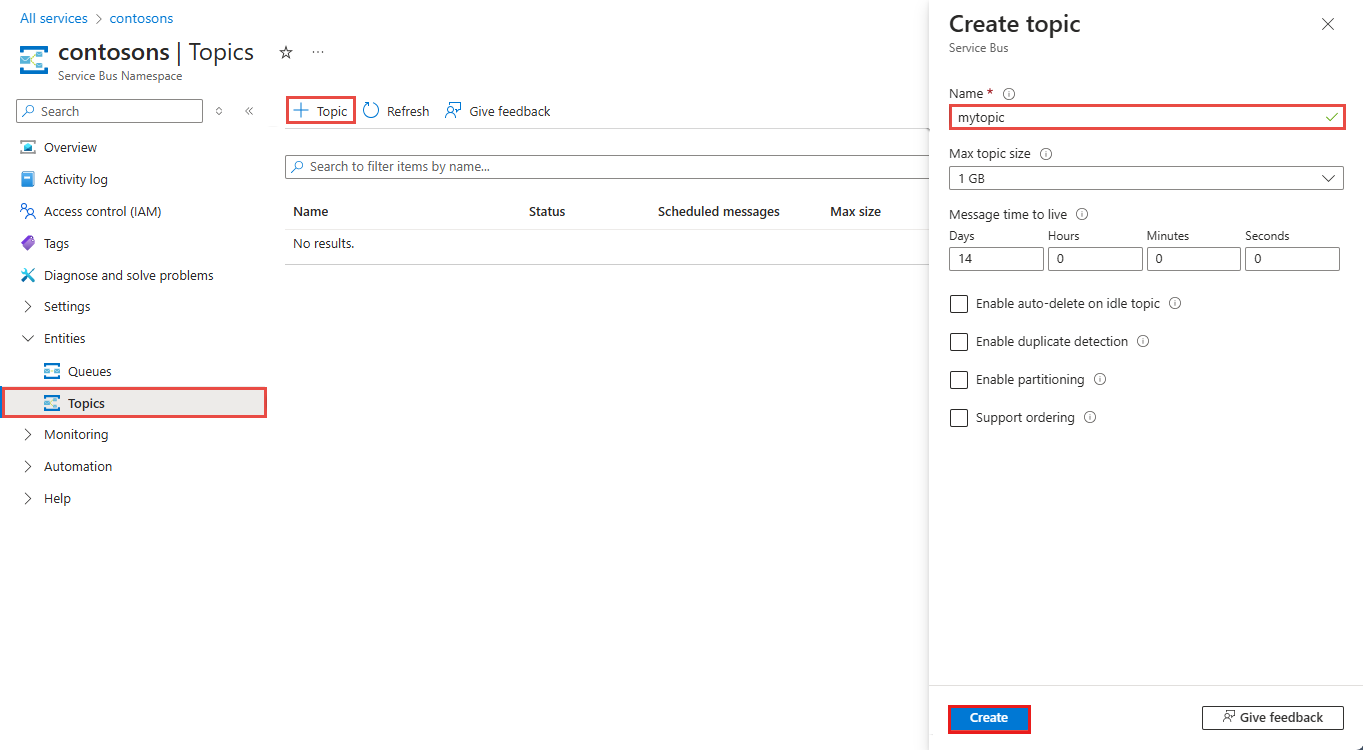
在Service Bus命名空间页上,展开左侧导航菜单上的Entities,然后在左侧菜单中选择Topics。
在工具栏中选择“+ 主题”。
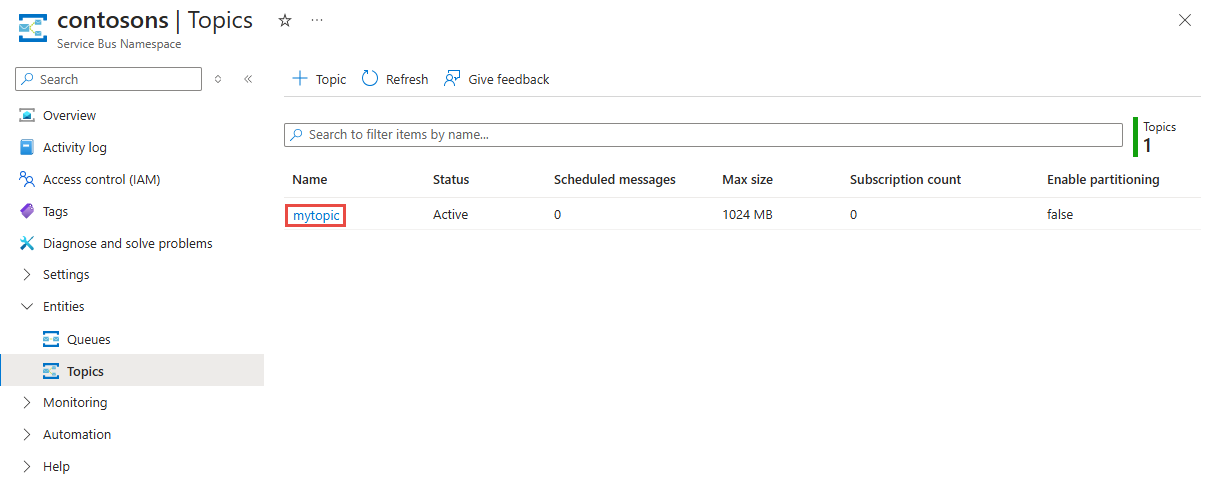
输入主题名称。 将其他选项保留默认值。
选择 创建。
创建主题的订阅
选择在上一部分创建的“主题”。
在Service Bus主题页上,选择工具栏上的+ 订阅。
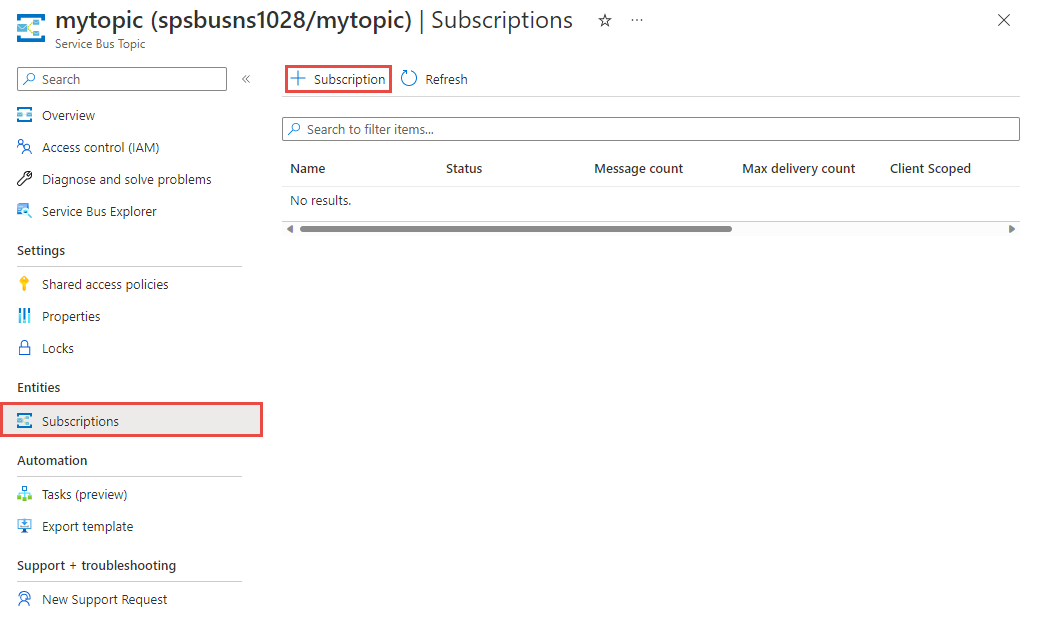
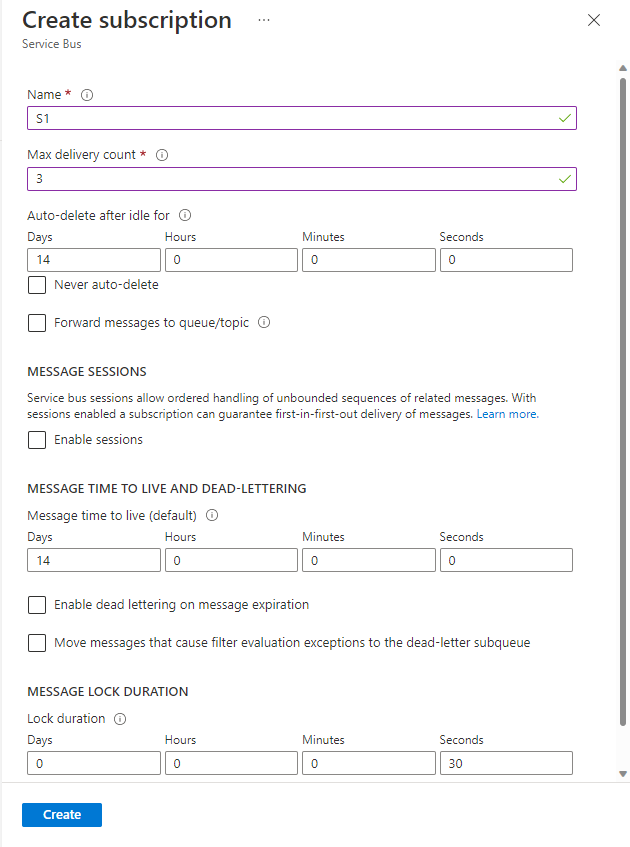
在“创建订阅”页上执行以下步骤:
对于订阅名称,输入“S1”。
然后,选择“创建”以创建订阅。
将应用程序认证到 Azure
本文介绍了连接到 Azure Service Bus的两种方法:passwordless 和 connection string。
第一个选项演示如何在Microsoft Entra ID和基于角色的访问控制(RBAC)中使用安全主体连接到Service Bus命名空间。 不必担心在代码、配置文件或安全存储(如 Azure Key Vault)中使用硬编码的连接字符串。
第二个选项演示如何使用connection string连接到Service Bus命名空间。 如果你不熟悉Azure,你可能会发现connection string选项更易于遵循。 建议在实际应用程序和生产环境中使用无密码选项。 有关详细信息,请参阅 Service Bus身份验证和授权。 若要详细了解无密码身份验证,请参阅 Authenticate .NET 应用。
将角色分配给Microsoft Entra用户
在本地开发时,请确保连接到Azure Service Bus的用户帐户具有正确的权限。 需要Azure Service Bus数据所有者角色才能发送和接收消息。 若要将此角色分配给自己,您需要 "User Access Administrator" 角色或其他包含 Microsoft.Authorization/roleAssignments/write 操作的角色。
可以使用Azure门户、Azure CLI或Azure PowerShell向用户分配Azure RBAC 角色。 若要详细了解角色分配的可用范围,请参阅 Azure RBAC 的可用范围。
以下示例将 Azure Service Bus Data Owner 角色分配给用户帐户,该角色提供对Azure Service Bus资源的完全访问权限。 在实际方案中,遵循 最低特权原则 ,仅向用户授予更安全的生产环境所需的最低权限。
Azure Service Bus 的 Azure 内置角色
对于Azure Service Bus,通过 Azure 门户和Azure资源管理 API 管理命名空间和所有相关资源已使用 Azure RBAC 模型进行保护。 Azure提供以下Azure内置角色,用于授权访问Service Bus命名空间:
- Azure Service Bus数据所有者:允许数据访问Service Bus命名空间及其实体,包括队列、主题、订阅和筛选器。 此角色的成员可以从队列或主题/订阅发送和接收消息。
-
Azure Service Bus数据发送方:使用此角色授予对Service Bus命名空间及其实体
send访问权限。 -
Azure Service Bus数据接收器:使用此角色向
receive授予对Service Bus命名空间及其实体的访问权限。
若要创建自定义角色,请参阅 Service Bus 操作所需的权限。
将Microsoft Entra用户添加到Azure Service Bus所有者角色
将您的 Microsoft Entra 用户名添加到 Service Bus 命名空间层级的 Azure Service Bus 数据所有者 角色。 此配置允许在用户帐户上下文中运行的应用将消息发送到队列或主题。 它可以接收来自队列或主题订阅的消息。
重要
在大多数情况下,角色分配在 Azure 中需要一到两分钟才能传播。 在极少数情况下,最多可能需要 8 分钟才能完成。 如果在首次运行代码时收到身份验证错误,请稍等片刻再试。
如果没有在Azure门户中打开Service Bus命名空间页,请使用主搜索栏或左侧导航找到Service Bus命名空间。
在 “概述 ”页上,从左侧菜单中选择 “访问控制”(IAM )。
在“访问控制 (IAM)”页上,选择“角色分配”选项卡。
从顶部菜单中选择 “+ 添加” ,然后 添加角色分配。

使用搜索框将结果筛选为所需角色。 对于此示例,请搜索
Azure Service Bus Data Owner并选择匹配的结果。 然后选择“下一步”。在“访问权限分配对象”下,选择“用户、组或服务主体”,然后选择“+ 选择成员”。
在对话框中,搜索Microsoft Entra用户名(通常是user@domain电子邮件地址),然后选择对话框底部的选择。
选择“审核 + 指派”转到最后一页,然后再次选择“审核 + 指派”以完成该过程。

将消息发送到主题
在本部分中,你将创建一个Java控制台项目,并添加代码以将消息发送到所创建的主题。
创建Java控制台项目
使用 Eclipse 或所选工具创建Java项目。
将应用程序配置为使用Service Bus
添加对 Azure Core 和 Azure Service Bus 库的引用。
如果使用 Eclipse 并创建了Java控制台应用程序, 将Java项目转换为 Maven:右键单击 Package Explorer 窗口中的项目,选择 Configure ->Convert 到 Maven 项目。 然后,将依赖项添加到这两个库,如以下示例所示。
更新 pom.xml 文件,将依赖项添加到Azure Service Bus和Azure标识包。
    <dependencies>
        <dependency>
            <groupId>com.azure</groupId>
            <artifactId>azure-messaging-servicebus</artifactId>
            <version>7.13.3</version>
        </dependency>
        <dependency>
            <groupId>com.azure</groupId>
            <artifactId>azure-identity</artifactId>
            <version>1.8.0</version>
            <scope>compile</scope>
        </dependency>
    </dependencies>
添加代码以将消息发送到主题
在Java文件的主题中添加以下
import语句。在类中,定义用于保存connection string(无需用于无密码方案)、主题名称和订阅名称的变量。
在类中添加一个名为
sendMessage的方法,以向主题发送一条消息。重要
将
NAMESPACENAME替换为 Service Bus 命名空间的名称。static void sendMessage() { // create a token using the default Azure credential DefaultAzureCredential credential = new DefaultAzureCredentialBuilder() .build(); ServiceBusSenderClient senderClient = new ServiceBusClientBuilder() .fullyQualifiedNamespace("NAMESPACENAME.servicebus.chinacloudapi.cn") .credential(credential) .sender() .topicName(topicName) .buildClient(); // send one message to the topic senderClient.sendMessage(new ServiceBusMessage("Hello, World!")); System.out.println("Sent a single message to the topic: " + topicName); }在类中添加一个名为
createMessages的方法,以创建消息列表。 通常,可以从应用程序的不同部分获得这些消息。 在这里,我们将创建一个示例消息列表。static List<ServiceBusMessage> createMessages() { // create a list of messages and return it to the caller ServiceBusMessage[] messages = { new ServiceBusMessage("First message"), new ServiceBusMessage("Second message"), new ServiceBusMessage("Third message") }; return Arrays.asList(messages); }添加一个名为
sendMessageBatch方法的方法,以将消息发送到你创建的主题。 此方法为主题创建ServiceBusSenderClient,调用createMessages方法来获取消息列表,准备一个或多个批处理,并将批处理发送到主题。重要
将
NAMESPACENAME替换为 Service Bus 命名空间的名称。static void sendMessageBatch() { // create a token using the default Azure credential DefaultAzureCredential credential = new DefaultAzureCredentialBuilder() .build(); ServiceBusSenderClient senderClient = new ServiceBusClientBuilder() .fullyQualifiedNamespace("NAMESPACENAME.servicebus.chinacloudapi.cn") .credential(credential) .sender() .topicName(topicName) .buildClient(); // Creates an ServiceBusMessageBatch where the ServiceBus. ServiceBusMessageBatch messageBatch = senderClient.createMessageBatch(); // create a list of messages List<ServiceBusMessage> listOfMessages = createMessages(); // We try to add as many messages as a batch can fit based on the maximum size and send to Service Bus when // the batch can hold no more messages. Create a new batch for next set of messages and repeat until all // messages are sent. for (ServiceBusMessage message : listOfMessages) { if (messageBatch.tryAddMessage(message)) { continue; } // The batch is full, so we create a new batch and send the batch. senderClient.sendMessages(messageBatch); System.out.println("Sent a batch of messages to the topic: " + topicName); // create a new batch messageBatch = senderClient.createMessageBatch(); // Add that message that we couldn't before. if (!messageBatch.tryAddMessage(message)) { System.err.printf("Message is too large for an empty batch. Skipping. Max size: %s.", messageBatch.getMaxSizeInBytes()); } } if (messageBatch.getCount() > 0) { senderClient.sendMessages(messageBatch); System.out.println("Sent a batch of messages to the topic: " + topicName); } //close the client senderClient.close(); }
从订阅接收消息
在本部分中,你将添加代码以从主题的订阅中检索消息。
添加名为
receiveMessages的方法,以从订阅检索消息。 此方法通过指定用于处理消息的处理程序和用于处理错误的另一个处理程序来为订阅创建ServiceBusProcessorClient。 然后,它将启动处理器,等待几秒钟,输出接收的消息,然后停止和关闭处理器。重要
- 将
NAMESPACENAME替换为 Service Bus 命名空间的名称。 - 将代码中
ServiceBusTopicTest中的ServiceBusTopicTest::processMessage替换为你的类的名称。
// handles received messages static void receiveMessages() throws InterruptedException { DefaultAzureCredential credential = new DefaultAzureCredentialBuilder() .build(); // Create an instance of the processor through the ServiceBusClientBuilder ServiceBusProcessorClient processorClient = new ServiceBusClientBuilder() .fullyQualifiedNamespace("NAMESPACENAME.servicebus.chinacloudapi.cn") .credential(credential) .processor() .topicName(topicName) .subscriptionName(subName) .processMessage(context -> processMessage(context)) .processError(context -> processError(context)) .buildProcessorClient(); System.out.println("Starting the processor"); processorClient.start(); TimeUnit.SECONDS.sleep(10); System.out.println("Stopping and closing the processor"); processorClient.close(); }- 将
添加
processMessage方法以处理从Service Bus订阅接收的消息。private static void processMessage(ServiceBusReceivedMessageContext context) { ServiceBusReceivedMessage message = context.getMessage(); System.out.printf("Processing message. Session: %s, Sequence #: %s. Contents: %s%n", message.getMessageId(), message.getSequenceNumber(), message.getBody()); }添加
processError方法以处理错误消息。private static void processError(ServiceBusErrorContext context) { System.out.printf("Error when receiving messages from namespace: '%s'. Entity: '%s'%n", context.getFullyQualifiedNamespace(), context.getEntityPath()); if (!(context.getException() instanceof ServiceBusException)) { System.out.printf("Non-ServiceBusException occurred: %s%n", context.getException()); return; } ServiceBusException exception = (ServiceBusException) context.getException(); ServiceBusFailureReason reason = exception.getReason(); if (reason == ServiceBusFailureReason.MESSAGING_ENTITY_DISABLED || reason == ServiceBusFailureReason.MESSAGING_ENTITY_NOT_FOUND || reason == ServiceBusFailureReason.UNAUTHORIZED) { System.out.printf("An unrecoverable error occurred. Stopping processing with reason %s: %s%n", reason, exception.getMessage()); } else if (reason == ServiceBusFailureReason.MESSAGE_LOCK_LOST) { System.out.printf("Message lock lost for message: %s%n", context.getException()); } else if (reason == ServiceBusFailureReason.SERVICE_BUSY) { try { // Choosing an arbitrary amount of time to wait until trying again. TimeUnit.SECONDS.sleep(1); } catch (InterruptedException e) { System.err.println("Unable to sleep for period of time"); } } else { System.out.printf("Error source %s, reason %s, message: %s%n", context.getErrorSource(), reason, context.getException()); } }更新
main方法以调用sendMessage、sendMessageBatch和receiveMessages方法,并引发InterruptedException。public static void main(String[] args) throws InterruptedException { sendMessage(); sendMessageBatch(); receiveMessages(); }
运行应用
运行程序,可以看到类似于以下输出的输出:
如果使用 Eclipse,请右键单击项目,选择 Export,展开 Java,选择 Runnable JAR 文件,然后按照步骤创建可运行的 JAR 文件。
如果使用与添加到 Azure Service Bus 数据所有者角色的用户帐户不同的用户帐户登录到计算机,请执行以下步骤。 否则,请跳过此步骤,然后在下一步中继续运行 Jar 文件。
在您的计算机上安装 Azure CLI。
运行以下 CLI 命令以登录到Azure。 使用与您添加到 Azure Service Bus 数据所有者角色的相同用户帐户。
az cloud set -n AzureChinaCloud
az login
# az cloud set -n AzureCloud   //means return to Public Azure.
使用以下命令运行 Jar 文件。
java -jar <JAR FILE NAME>控制台窗口中会显示以下输出。
Sent a single message to the topic: mytopic
Sent a batch of messages to the topic: mytopic
Starting the processor
Processing message. Session: e0102f5fbaf646988a2f4b65f7d32385, Sequence #: 1. Contents: Hello, World!
Processing message. Session: 3e991e232ca248f2bc332caa8034bed9, Sequence #: 2. Contents: First message
Processing message. Session: 56d3a9ea7df446f8a2944ee72cca4ea0, Sequence #: 3. Contents: Second message
Processing message. Session: 7bd3bd3e966a40ebbc9b29b082da14bb, Sequence #: 4. Contents: Third message
在 Azure 门户中Service Bus命名空间的 Overview 页上,可以看到传入和 outgoing 消息计数。 等待一分钟左右,然后刷新页面以查看最新值。

切换到位于中下部窗格的 Topics 选项卡,然后选择主题以查看该主题的 Service Bus 主题 页。 在此页上,“消息”图表中应显示四条传入消息和四条传出消息。

如果在 receiveMessages 方法中将 main 调用注释掉并再次运行应用程序,那么在 Service Bus Topic 页面上,您将看到 8 条传入消息(其中 4 条为新消息),但只有 4 条传出消息。

在此页上,如果选择订阅,将访问 Service Bus Subscription 页。 可以在此页上查看活动消息计数、死信消息计数等。 在此示例中,还有四条活动消息未被接收器接收。

后续步骤
请参阅以下文档和示例:
- 适用于 Java 的 Azure Service Bus 客户端库 - 自述文件
- GitHub 上的示例
- Java API 参考