重要
Azure 磁盘加密计划于 2028 年 9 月 15 日停用。 在该日期之前,可以继续使用 Azure 磁盘加密,而不会中断。 2028 年 9 月 15 日,已启用 ADE 的工作负荷将继续运行,但 VM 重启后加密磁盘将无法解锁,从而导致服务中断。
使用 主机端加密 用于新 VM。 所有已启用 ADE 的 VM(包括备份)必须在停用日期之前迁移到主机上的加密,以避免服务中断。 有关详细信息,请参阅 从 Azure 磁盘加密迁移到主机加密 。
注意
本文引用了 CentOS,这是一个处于生命周期结束 (EOL) 状态的 Linux 发行版。 请相应地考虑你的使用和规划。 有关详细信息,请参阅 CentOS 生命周期结束指南。
适用于:✔️ Linux VM ✔️ 灵活规模集
本文提供了用于准备预加密 VHD 和其他任务的示例脚本。
注意
除非另有说明,否则所有脚本均引用最新的非 AAD 版本的 ADE。
Azure 磁盘加密的示例 PowerShell 脚本
列出订阅中所有已加密的 VM
可以使用此 PowerShell 脚本在订阅中存在的所有资源组中找到所有 ADE 加密的 VM 和扩展版本。
另外,这些 cmdlet 将显示所有 ADE 加密的 VM(但不显示扩展版本):
$osVolEncrypted = {(Get-AzVMDiskEncryptionStatus -ResourceGroupName $_.ResourceGroupName -VMName $_.Name).OsVolumeEncrypted}
$dataVolEncrypted= {(Get-AzVMDiskEncryptionStatus -ResourceGroupName $_.ResourceGroupName -VMName $_.Name).DataVolumesEncrypted}
Get-AzVm | Format-Table @{Label="MachineName"; Expression={$_.Name}}, @{Label="OsVolumeEncrypted"; Expression=$osVolEncrypted}, @{Label="DataVolumesEncrypted"; Expression=$dataVolEncrypted}
列出订阅中所有已加密的 VMSS 实例
可以使用此 PowerShell 脚本在订阅中存在的所有资源组中找到所有 ADE 加密的 VMSS 实例和扩展版本。
列出 Key Vault 中用于加密 VM 的所有磁盘加密机密
Get-AzKeyVaultSecret -VaultName $KeyVaultName | where {$_.Tags.ContainsKey('DiskEncryptionKeyFileName')} | format-table @{Label="MachineName"; Expression={$_.Tags['MachineName']}}, @{Label="VolumeLetter"; Expression={$_.Tags['VolumeLetter']}}, @{Label="EncryptionKeyURL"; Expression={$_.Id}}
使用 Azure 磁盘加密先决条件 PowerShell 脚本
如果你已熟悉进行 Azure 磁盘加密的先决条件,则可以使用 Azure 磁盘加密先决条件 PowerShell 脚本。 有关此 PowerShell 脚本的用法示例,请参阅有关加密 VM 的快速入门。 可以删除脚本的某个部分中的注释(从第 211 行开始),以加密现有资源组中现有 VM 的所有磁盘。
下表显示了可在 PowerShell 脚本中使用的参数:
| 参数 | 说明 | 必需? |
|---|---|---|
| $resourceGroupName | KeyVault 所属的资源组的名称。 如果不存在具有此名称的资源组,则会新建一个资源组。 | True |
| $keyVaultName | 要将加密密钥放到的 KeyVault 的名称。 如果不存在具有此名称的保管库,则会新建一个保管库。 | True |
| $location | KeyVault 的位置。 请确保 KeyVault 和要加密的 VM 位于同一位置。 使用 Get-AzLocation 获取位置列表。 |
True |
| $subscriptionId | 要使用的 Azure 订阅的标识符。 可以使用 Get-AzSubscription 获取订阅 ID。 |
True |
| $aadAppName | 用于将机密写入 KeyVault 的 Microsoft Entra 应用程序的名称。 如果该应用程序不存在,则会使用此名称创建新的应用程序。 如果此应用已存在,则将 aadClientSecret 参数传递给脚本。 | False |
| $aadClientSecret | 之前创建的 Microsoft Entra 应用程序的客户端密码。 | False |
| $keyEncryptionKeyName | KeyVault 中的可选密钥加密密钥的名称。 如果不存在具有此名称的密钥,则会新建一个密钥。 | False |
在不使用 Microsoft Entra 应用的情况下加密或解密 VM
- 在现有或正在运行的 Linux VM 上启用磁盘加密
-
在正在运行的 Linux VM 上禁用加密
- 只允许对 Linux VM 的数据卷禁用加密。
使用 Microsoft Entra 应用加密或解密 VM(早期版本)
- 在现有或正在运行的 Linux VM 上启用磁盘加密
-
在正在运行的 Linux VM 上禁用加密
- 只允许对 Linux VM 的数据卷禁用加密。
-
从预加密的 VHD/存储 Blob 创建新的加密托管磁盘
- 在提供预加密 VHD 及其对应加密设置的情况下创建新的加密托管磁盘
在正在运行的 Linux VM 上加密 OS 驱动器
OS 磁盘加密的先决条件
- VM 必须使用与 Azure 磁盘加密支持的操作系统中列出的 OS 磁盘加密兼容的分发版
- 必须从 Azure 资源管理器中的市场映像创建 VM。
- Azure VM,至少具有 4 GB RAM(建议大小为 7 GB)。 有关详细信息,请参阅内存要求。
- (针对 RHEL 和 CentOS)禁用 SELinux。 若要禁用 SELinux,请参阅 SELinux User's and Administrator's Guide(SELinux 用户和管理员指南)中针对 VM 的“4.4.2. Disabling SELinux(4.4.2. 禁用 SELinux)”。
- 禁用 SELinux 后,重启 VM 至少一次。
步骤
通过之前指定的分发版之一创建 VM。
根据需要配置 VM。 如果打算加密所有(OS + 数据)驱动器,则需要指定数据驱动器且可从 /etc/fstab 处装载数据驱动器。
注意
使用 UUID =... 在 /etc/fstab 中指定数据驱动器(而不是指定 /dev/sdb1 等块设备名称)。 在加密过程中,驱动器的顺序将在 VM 上有所改变。 如果 VM 依赖于特定块设备顺序,加密后将无法装载。
注销 SSH 会话。
若要加密 OS,请在启用加密时将 volumeType 指定为“All”或“OS”。
注意
未作为
systemd服务运行的所有用户空间进程应使用SIGKILL终止。 重启 VM。 在正在运行的 VM 上启用 OS 磁盘加密时,请计划 VM 停机时间。使用下一部分中的说明,定期监视加密进度。
Get-AzVmDiskEncryptionStatus 显示“VMRestartPending”后,通过登录 VM 或使用门户/PowerShell/CLI 重启 VM。
C:\> Get-AzVmDiskEncryptionStatus  -ResourceGroupName $ResourceGroupName -VMName $VMName
-ExtensionName $ExtensionName
OsVolumeEncrypted : VMRestartPending DataVolumesEncrypted : NotMounted OsVolumeEncryptionSettings : Microsoft.Azure.Management.Compute.Models.DiskEncryptionSettings ProgressMessage : OS disk successfully encrypted, reboot the VM重启之前,建议保存 VM 的启动诊断。
监视 OS 加密进度
可通过三种方法监视 OS 加密进度:
使用
Get-AzVmDiskEncryptionStatuscmdlet 并检查“ProgressMessage”字段:Get-AzVMDiskEncryptionStatus -ResourceGroupName $_.ResourceGroupName -VMName $_.NameOsVolumeEncrypted : EncryptionInProgress DataVolumesEncrypted : NotMounted OsVolumeEncryptionSettings : Microsoft.Azure.Management.Compute.Models.DiskEncryptionSettings ProgressMessage : OS disk encryption startedVM 变为“OS 磁盘加密开始”后,在支持高级存储的 VM 上将需要花费大约 40-50 分钟。
由于 WALinuxAgent 出现问题 #388,
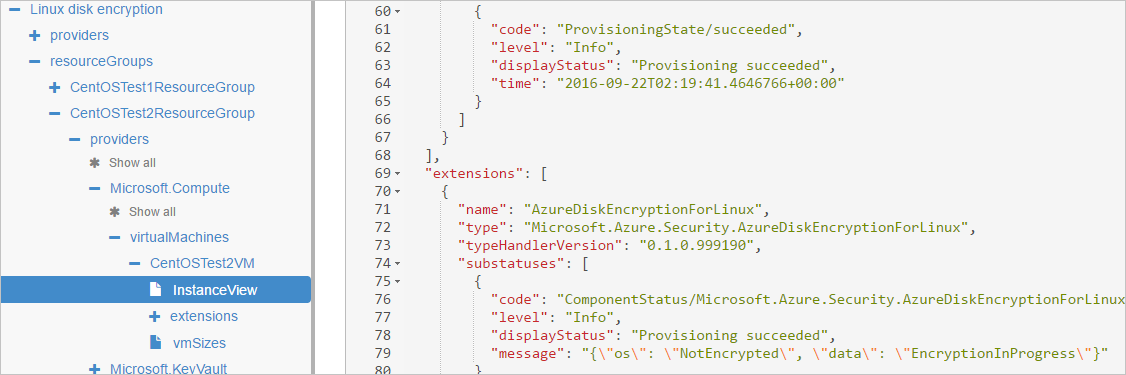
OsVolumeEncrypted和DataVolumesEncrypted在某些发行版中显示为Unknown。 在 WALinuxAgent 2.1.5 版及更高版本中,将自动修复此问题。 如果在输出中看到Unknown,可通过使用 Azure 资源浏览器验证磁盘加密状态。转到 Azure 资源浏览器,然后在左侧的选择面板中展开此层次结构:
|-- subscriptions
   |-- [Your subscription]
        |-- resourceGroups
             |-- [Your resource group]
                  |-- providers
                       |-- Microsoft.Compute
                            |-- virtualMachines
                                 |-- [Your virtual machine]
                                      |-- InstanceView
在 InstanceView 中,向下滚动以查看驱动器的加密状态。
查看启动诊断。 来自 ADE 扩展的消息应带有前缀
[AzureDiskEncryption]。通过 SSH 登录 VM 并从以下位置获取扩展日志:
/var/log/azure/Microsoft.Azure.Security.AzureDiskEncryptionForLinux
建议不要在 OS 加密正在进行时登录 VM。 仅当其他两个方法都失败时复制日志。
准备预加密的 Linux VHD
预加密 VHD 的准备过程根据分发版的不同而异。 我们提供了有关准备 Ubuntu、openSUSE 和 CentOS 7 的示例。
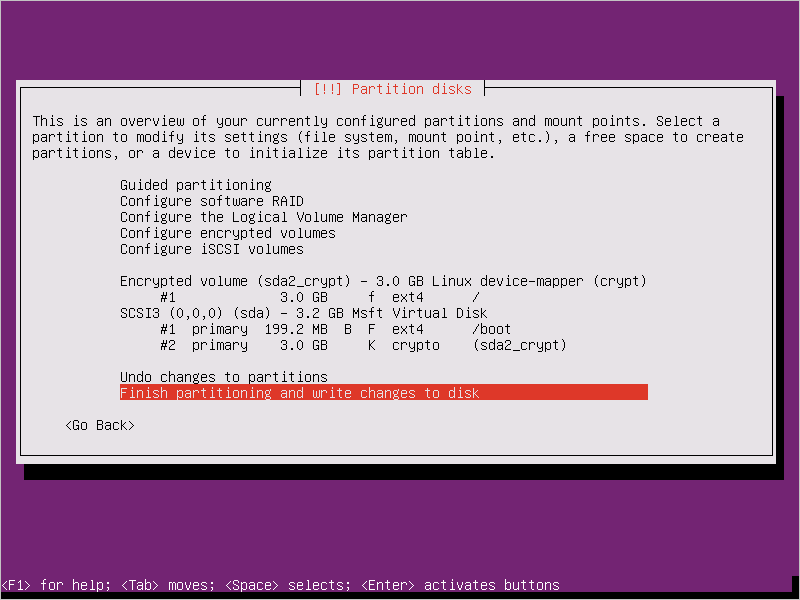
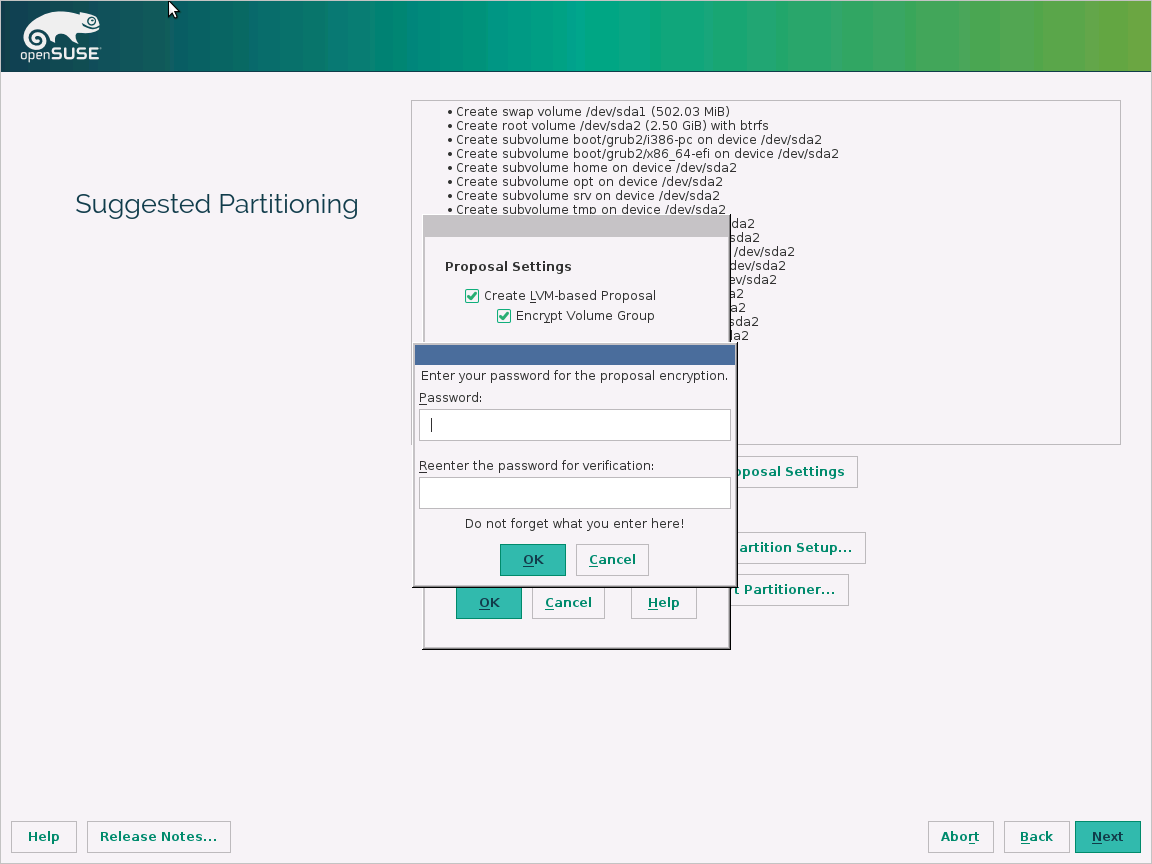
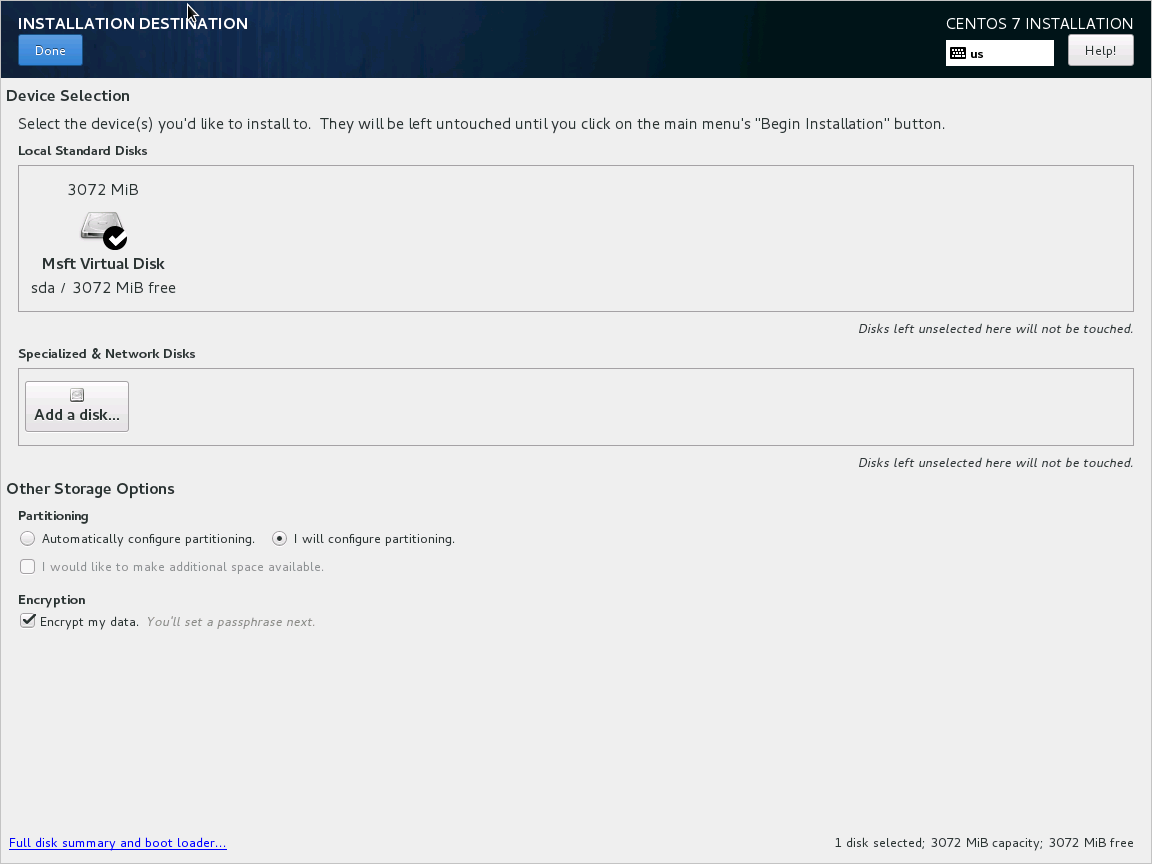
通过执行以下步骤在分发版安装过程中配置加密:
对磁盘进行分区时选择“配置加密卷” 。
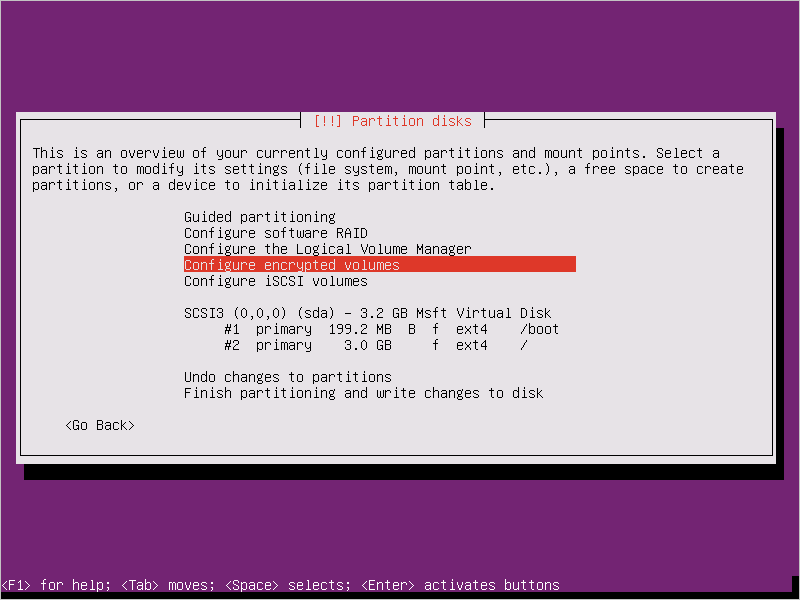
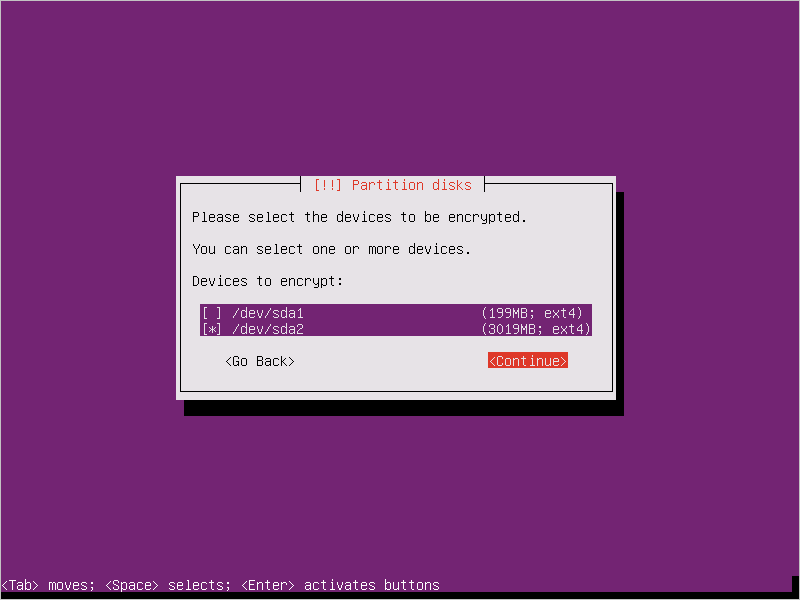
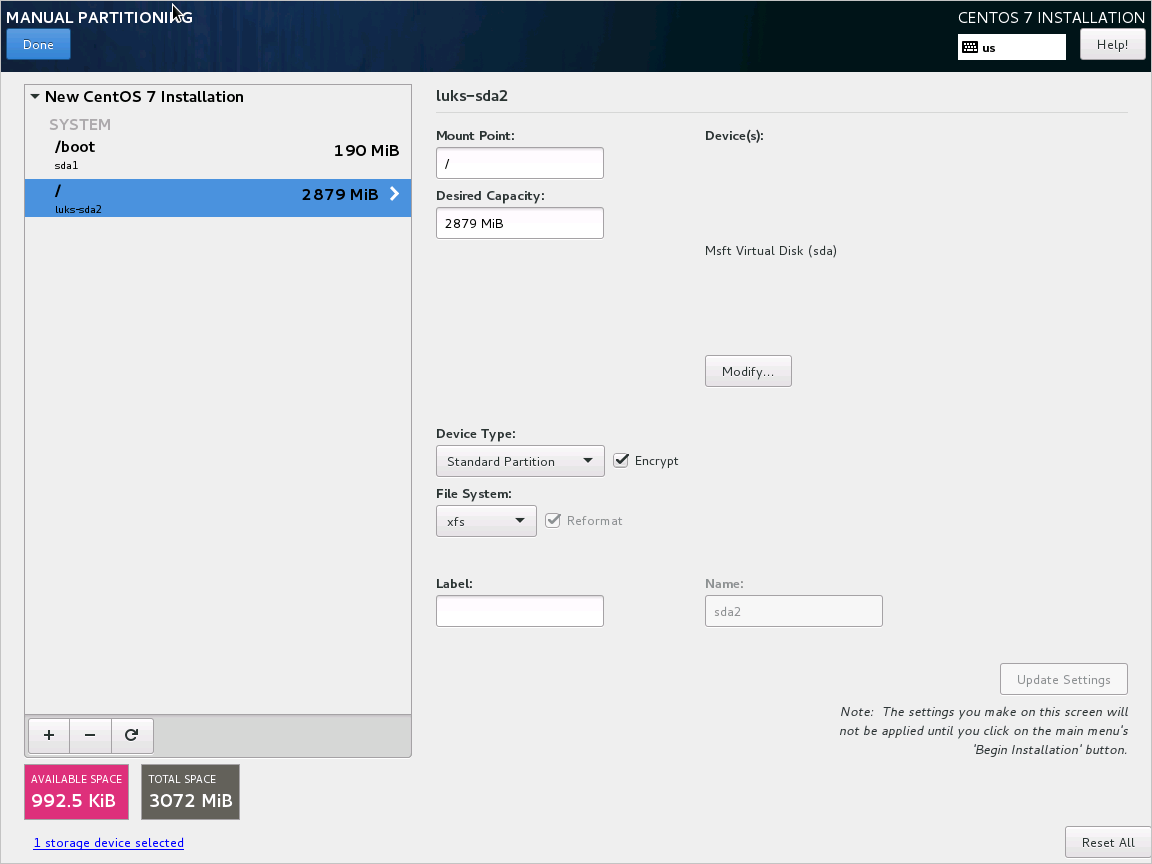
创建一个单独的不得加密的启动驱动器。 对根驱动器进行加密。
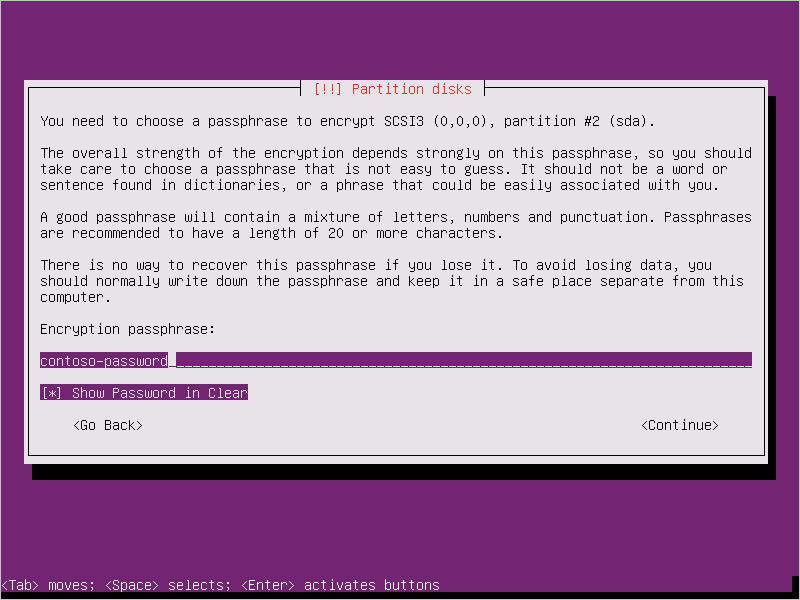
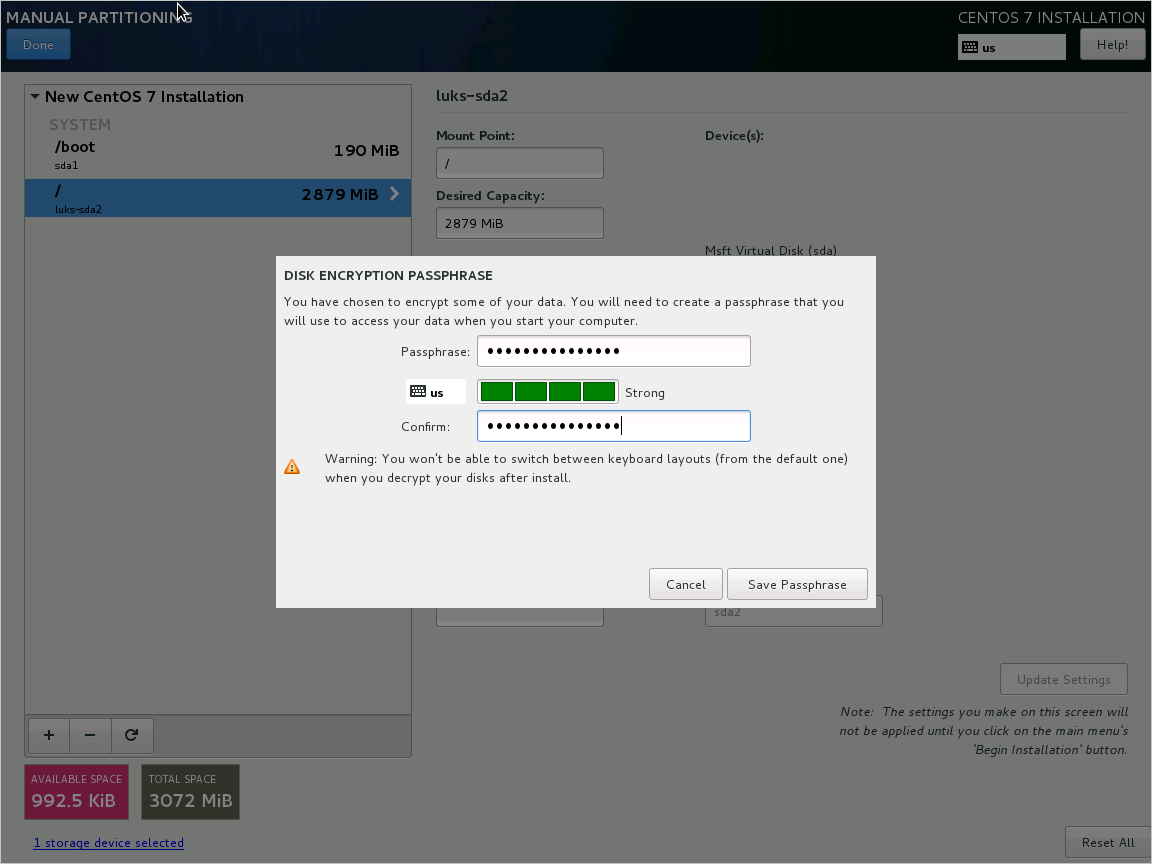
提供通行短语。 这是上传到 Key Vault 的通行短语。
完成分区。
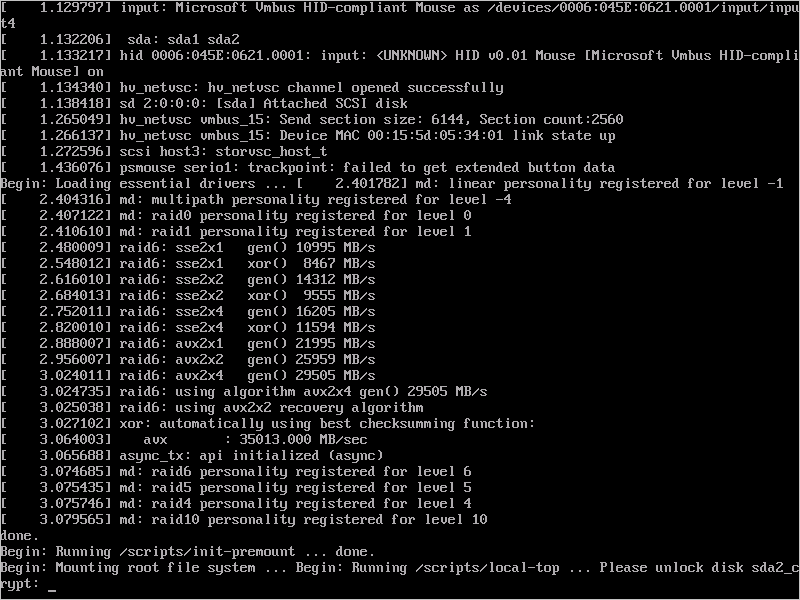
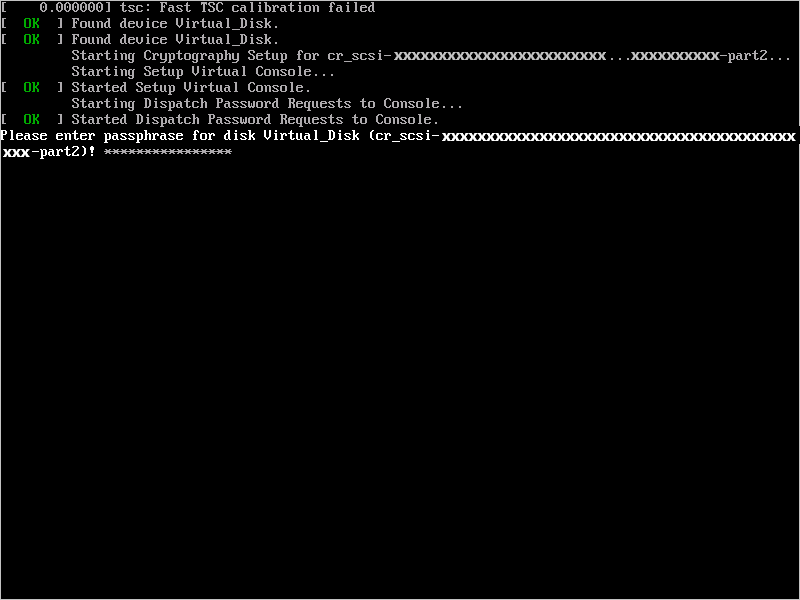
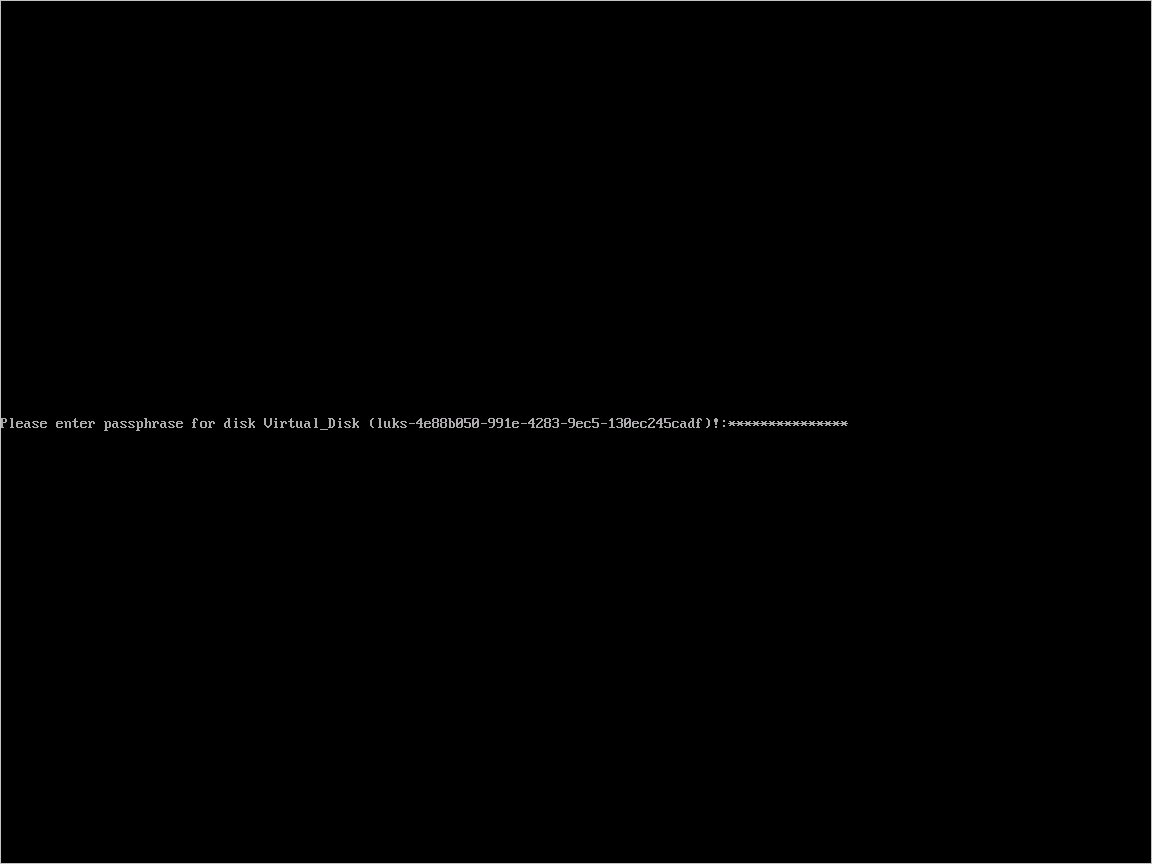
启动 VM 并被要求提供密码时,请使用步骤 3 中提供的密码。
使用这些说明准备 VM 以上传到 Azure。 暂时不要运行最后一个步骤(取消预配 VM)。
执行以下步骤,配置适用于 Azure 的加密:
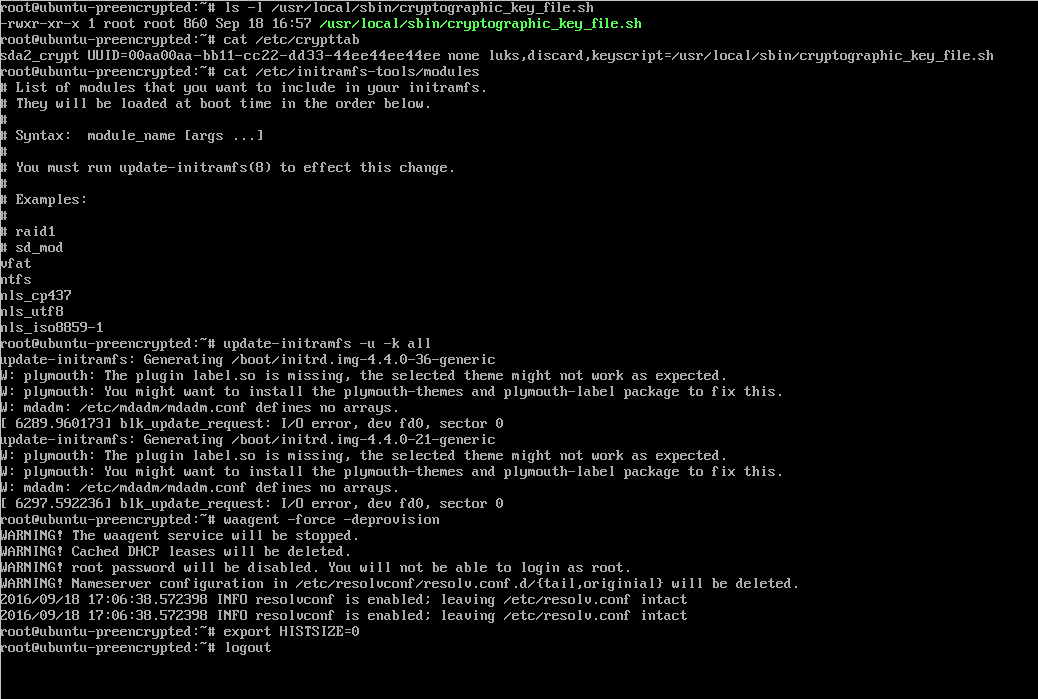
在
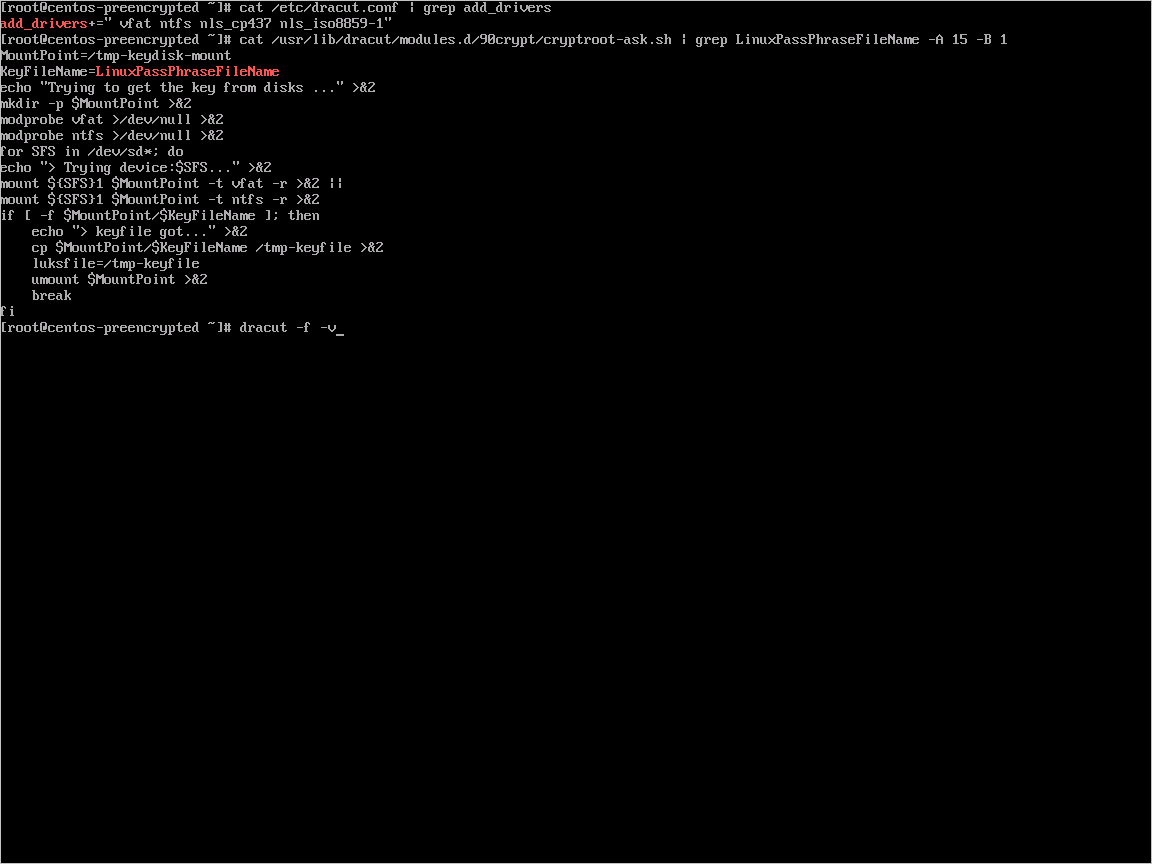
/usr/local/sbin/azure_crypt_key.sh下创建文件,其内容如以下脚本所示。 请注意 KeyFileName,因为它是 Azure 使用的通行短语文件名。#!/bin/sh MountPoint=/tmp-keydisk-mount KeyFileName=LinuxPassPhraseFileName echo "Trying to get the key from disks ..." >&2 mkdir -p $MountPoint modprobe vfat >/dev/null 2>&1 modprobe ntfs >/dev/null 2>&1 sleep 2 OPENED=0 cd /sys/block for DEV in sd*; do echo "> Trying device: $DEV ..." >&2 mount -t vfat -r /dev/${DEV}1 $MountPoint >/dev/null|| mount -t ntfs -r /dev/${DEV}1 $MountPoint >/dev/null if [ -f $MountPoint/$KeyFileName ]; then cat $MountPoint/$KeyFileName umount $MountPoint 2>/dev/null OPENED=1 break fi umount $MountPoint 2>/dev/null done if [ $OPENED -eq 0 ]; then echo "FAILED to find suitable passphrase file ..." >&2 echo -n "Try to enter your password: " >&2 read -s -r A </dev/console echo -n "$A" else echo "Success loading keyfile!" >&2 fi在 /etc/crypttab 中更改加密配置。 它看起来应该如下所示:
xxx_crypt uuid=xxxxxxxxxxxxxxxxxxxxx none luks,discard,keyscript=/usr/local/sbin/azure_crypt_key.sh将可执行文件的权限添加到脚本:
sudo chmod +x /usr/local/sbin/azure_crypt_key.sh通过追加行编辑
/etc/initramfs-tools/modules:vfat ntfs nls_cp437 nls_utf8 nls_iso8859-1运行
update-initramfs -u -k all更新 initramfs 以使keyscript生效。现在可以取消预配 VM。
继续执行下一步,将 VHD 上传到 Azure 中。
将加密的 VHD 上传到 Azure 存储帐户
启用 DM-Crypt 加密后,需要将本地加密的 VHD 上传到存储帐户。
Add-AzVhd [-Destination] <Uri> [-LocalFilePath] <FileInfo> [[-NumberOfUploaderThreads] <Int32> ] [[-BaseImageUriToPatch] <Uri> ] [[-OverWrite]] [ <CommonParameters>]
将预加密 VM 的机密上传到密钥保管库
使用 Microsoft Entra 应用(以前的版本)加密时,必须上传前面获取的磁盘加密机密作为 Key Vault 中的机密。 Key Vault 需要具有对 Microsoft Entra 客户端启用的磁盘加密等权限。
 $AadClientId = "My-AAD-Client-Id"
 $AadClientSecret = "My-AAD-Client-Secret"

 $key vault = New-AzKeyVault -VaultName $KeyVaultName -ResourceGroupName $ResourceGroupName -Location $Location

 Set-AzKeyVaultAccessPolicy -VaultName $KeyVaultName -ResourceGroupName $ResourceGroupName -ServicePrincipalName $AadClientId -PermissionsToKeys all -PermissionsToSecrets all
 Set-AzKeyVaultAccessPolicy -VaultName $KeyVaultName -ResourceGroupName $ResourceGroupName -EnabledForDiskEncryption
未使用 KEK 加密的磁盘加密机密
若要在密钥保管库中设置机密,请使用 Set-AzKeyVaultSecret。 将密码编码为 base64 字符串,然后将其上传到密钥保管库。 此外,请确保在 Key Vault 中创建机密时设置以下标记。
 # This is the passphrase that was provided for encryption during the distribution installation
 $passphrase = "contoso-password"

 $tags = @{"DiskEncryptionKeyEncryptionAlgorithm" = "RSA-OAEP"; "DiskEncryptionKeyFileName" = "LinuxPassPhraseFileName"}
 $secretName = [guid]::NewGuid().ToString()
 $secretValue = [Convert]::ToBase64String([System.Text.Encoding]::ASCII.GetBytes($passphrase))
 $secureSecretValue = ConvertTo-SecureString $secretValue -AsPlainText -Force

 $secret = Set-AzKeyVaultSecret -VaultName $KeyVaultName -Name $secretName -SecretValue $secureSecretValue -tags $tags
 $secretUrl = $secret.Id
在下一步中使用 $secretUrl 以便在不使用 KEK 的情况下附加 OS 磁盘。
使用 KEK 加密的磁盘加密机密
将机密上传到 Key Vault 之前,可根据需要使用密钥加密密钥对其进行加密。 先使用包装 API 加密使用密钥加密密钥的机密。 此包装操作的输出是 base64 URL 编码的字符串,可以使用 Set-AzKeyVaultSecret cmdlet 将其作为机密上传。
    # This is the passphrase that was provided for encryption during the distribution installation
    $passphrase = "contoso-password"

    Add-AzKeyVaultKey -VaultName $KeyVaultName -Name "keyencryptionkey" -Destination Software
    $KeyEncryptionKey = Get-AzKeyVaultKey -VaultName $KeyVault.OriginalVault.Name -Name "keyencryptionkey"

    $apiversion = "2015-06-01"

    ##############################
    # Get Auth URI
    ##############################

    $uri = $KeyVault.VaultUri + "/keys"
    $headers = @{}

    $response = try { Invoke-RestMethod -Method GET -Uri $uri -Headers $headers } catch { $_.Exception.Response }

    $authHeader = $response.Headers["www-authenticate"]
    $authUri = [regex]::match($authHeader, 'authorization="(.*?)"').Groups[1].Value

    Write-Host "Got Auth URI successfully"

    ##############################
    # Get Auth Token
    ##############################

    $uri = $authUri + "/oauth2/token"
    $body = "grant_type=client_credentials"
    $body += "&client_id=" + $AadClientId
    $body += "&client_secret=" + [Uri]::EscapeDataString($AadClientSecret)
    $body += "&resource=" + [Uri]::EscapeDataString("https://vault.azure.cn")
    $headers = @{}

    $response = Invoke-RestMethod -Method POST -Uri $uri -Headers $headers -Body $body

    $access_token = $response.access_token

    Write-Host "Got Auth Token successfully"

    ##############################
    # Get KEK info
    ##############################

    $uri = $KeyEncryptionKey.Id + "?api-version=" + $apiversion
    $headers = @{"Authorization" = "Bearer " + $access_token}

    $response = Invoke-RestMethod -Method GET -Uri $uri -Headers $headers

    $keyid = $response.key.kid

    Write-Host "Got KEK info successfully"

    ##############################
    # Encrypt passphrase using KEK
    ##############################

    $passphraseB64 = [Convert]::ToBase64String([System.Text.Encoding]::ASCII.GetBytes($Passphrase))
    $uri = $keyid + "/encrypt?api-version=" + $apiversion
    $headers = @{"Authorization" = "Bearer " + $access_token; "Content-Type" = "application/json"}
    $bodyObj = @{"alg" = "RSA-OAEP"; "value" = $passphraseB64}
    $body = $bodyObj | ConvertTo-Json

    $response = Invoke-RestMethod -Method POST -Uri $uri -Headers $headers -Body $body

    $wrappedSecret = $response.value

    Write-Host "Encrypted passphrase successfully"

    ##############################
    # Store secret
    ##############################

    $secretName = [guid]::NewGuid().ToString()
    $uri = $KeyVault.VaultUri + "/secrets/" + $secretName + "?api-version=" + $apiversion
    $secretAttributes = @{"enabled" = $true}
    $secretTags = @{"DiskEncryptionKeyEncryptionAlgorithm" = "RSA-OAEP"; "DiskEncryptionKeyFileName" = "LinuxPassPhraseFileName"}
    $headers = @{"Authorization" = "Bearer " + $access_token; "Content-Type" = "application/json"}
    $bodyObj = @{"value" = $wrappedSecret; "attributes" = $secretAttributes; "tags" = $secretTags}
    $body = $bodyObj | ConvertTo-Json

    $response = Invoke-RestMethod -Method PUT -Uri $uri -Headers $headers -Body $body

    Write-Host "Stored secret successfully"

    $secretUrl = $response.id
将在下一步中使用 $KeyEncryptionKey 和 $secretUrl 以便在使用 KEK 的情况下附加 OS 磁盘。
附加 OS 磁盘时指定机密 URL
不使用 KEK
附加 OS 磁盘时,需要传递 $secretUrl。 该 URL 是在“不使用 KEK 对磁盘加密机密进行加密”部分中生成的。
    Set-AzVMOSDisk `
            -VM $VirtualMachine `
            -Name $OSDiskName `
            -SourceImageUri $VhdUri `
            -VhdUri $OSDiskUri `
            -Linux `
            -CreateOption FromImage `
            -DiskEncryptionKeyVaultId $KeyVault.ResourceId `
            -DiskEncryptionKeyUrl $SecretUrl
使用 KEK
附加 OS 磁盘时,传递 $KeyEncryptionKey 和 $secretUrl。 该 URL 是在“使用 KEK 加密的磁盘加密机密”部分生成的。
    Set-AzVMOSDisk `
            -VM $VirtualMachine `
            -Name $OSDiskName `
            -SourceImageUri $CopiedTemplateBlobUri `
            -VhdUri $OSDiskUri `
            -Linux `
            -CreateOption FromImage `
            -DiskEncryptionKeyVaultId $KeyVault.ResourceId `
            -DiskEncryptionKeyUrl $SecretUrl `
            -KeyEncryptionKeyVaultId $KeyVault.ResourceId `
            -KeyEncryptionKeyURL $KeyEncryptionKey.Id