Note
Access to this page requires authorization. You can try signing in or changing directories.
Access to this page requires authorization. You can try changing directories.
The Azure Content Delivery Network provides developers with solutions for delivering high-bandwidth content via caching static content in storage blobs, cloud services, and websites on the Azure platform by using a large number of physical nodes distributed across China. This network also currently supports the use of source stations that have not been deployed on the Azure platform.
This task includes the following steps:
- Step 1: Create a storage account, cloud service, web application
- Step 2: Create a CDN Profile resource
- Step 3: Create a CDN EndPoint node
- Step 4: Use advanced management features
The advantages of using the Content Delivery Network to cache Azure data include:
- Better performance and user experience for users of apps with distant content sources that require the use of multiple internet journeys to load content.
- Large-scale distribution that enables the system to cope better with transient high loads (for example, at the start of events such as product launches).
Existing Azure customers in China can now use the Content Delivery Network in the Azure portal.
Step 1: Create a storage account, cloud service, web application
You can create Content Delivery Network endpoints for storage accounts, cloud services, web applications in existing Azure subscriptions. You can also create new storage accounts, cloud services, or web applications for use in Azure subscriptions according to the following methods:
Create a storage account for Azure subscriptions
Refer to How to create a storage account
Create a cloud service for Azure subscriptions
Refer to How to create and deploy cloud services
Create a web application for Azure subscriptions
Refer to How to create and deploy web applications
Step 2: Create a CDN Profile resource
Click Create Resource in the Azure Management Portal, select Web+Mobile, then select CDN Profile
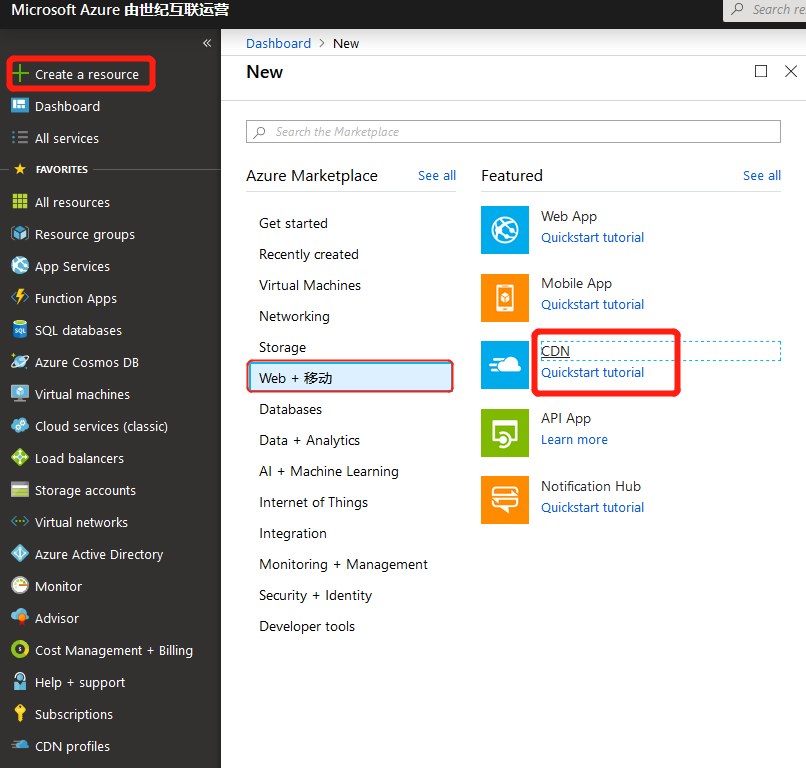
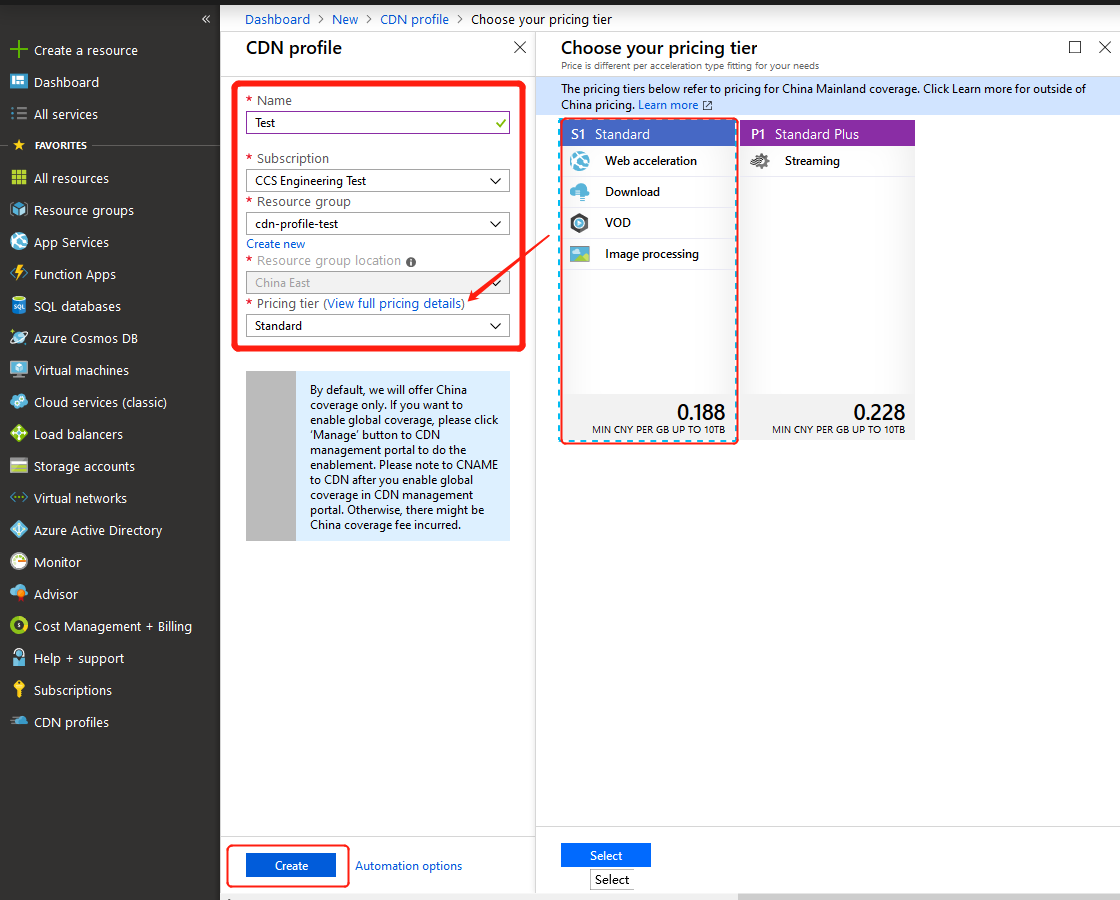
Fill in the required information and click Create
Subscription Select a subscription
Resource group Select an existing resource (if no resources have been created, select Create new)
Resource group location Defaults to the automatically-selected region
Pricing tier Please select "S1 Standard" ("P1 Premium" refers to refers to customers who requested that Azure CDN applies for certificates on their behalf, are still being served using this certificate, and are still paying for the premium version of the CDN).
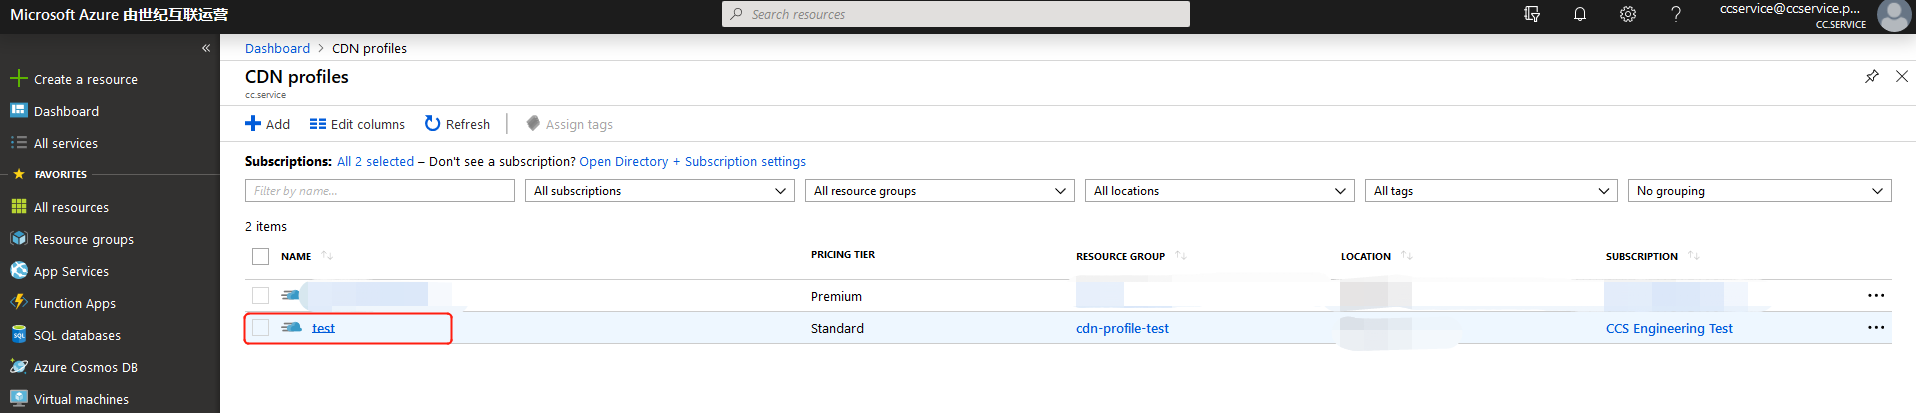
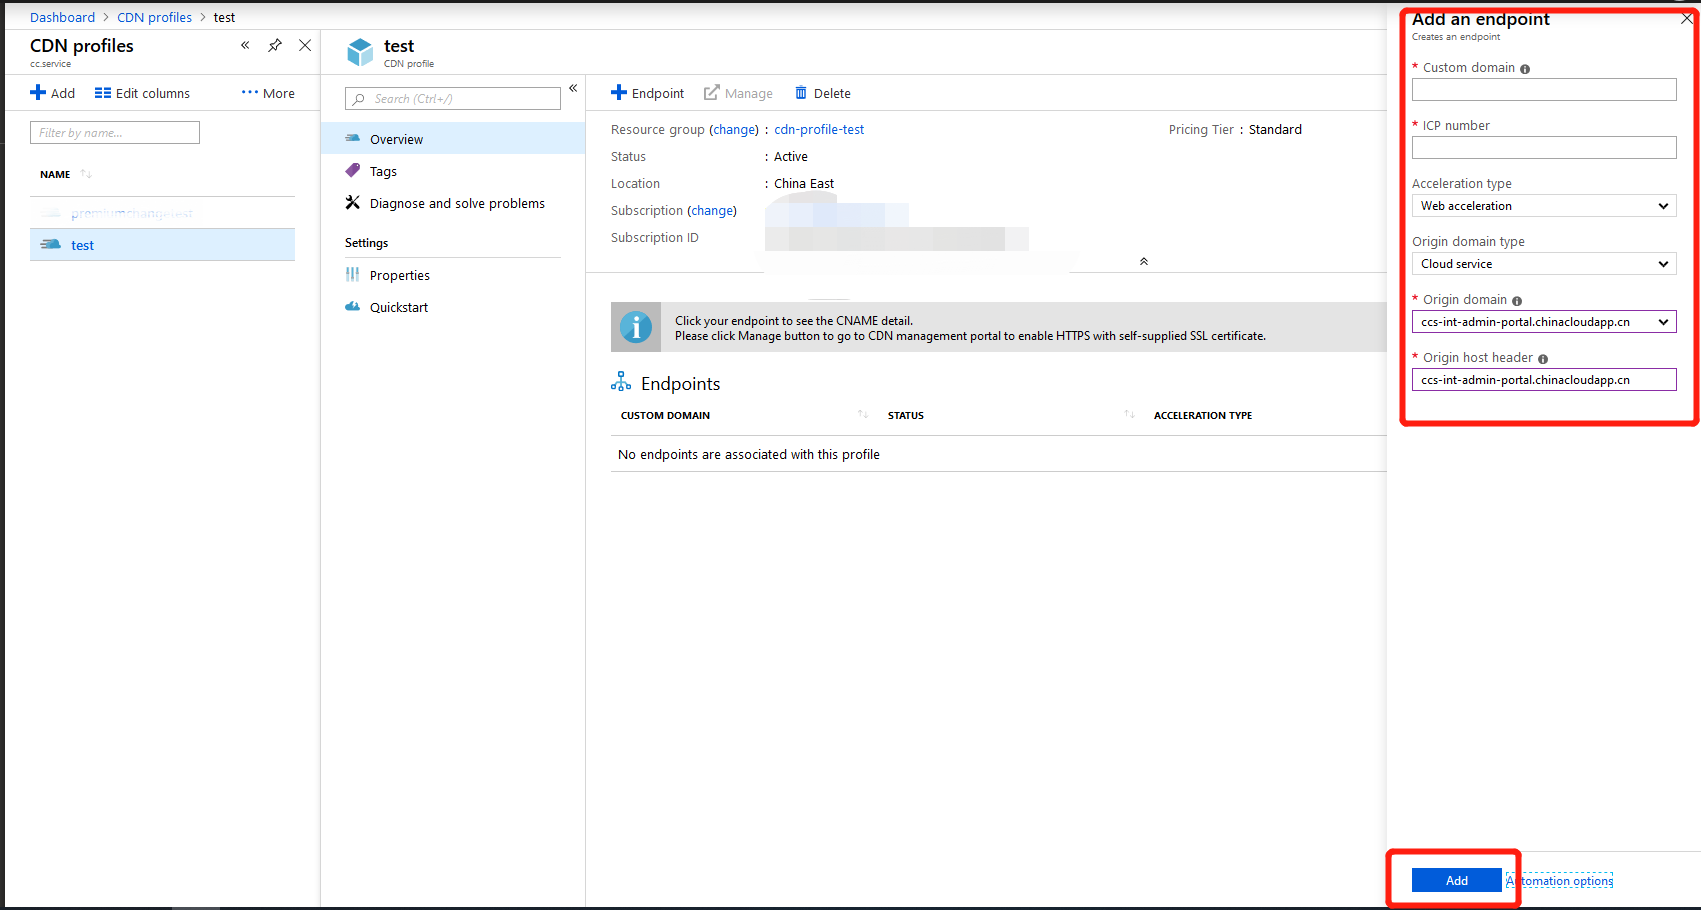
Step 3: Create a new CDN EndPoint node
Find the created Profiles record in the CDN Profiles list, then click on the name
Click EndPoint
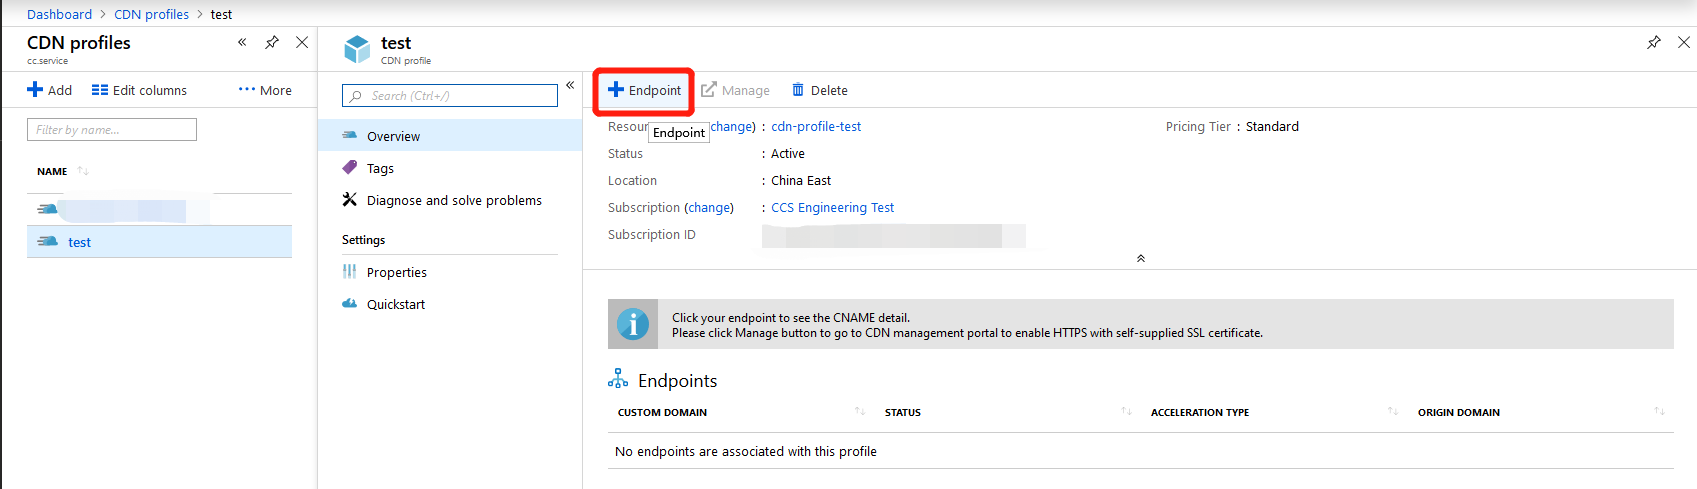
Enter the required fields ('*' denotes a required field) and click [Add] to save
Customer domain: The domain name requiring acceleration.
ICP: The ICP record number for domain names filed in China (For example: 京ICP备XXXXXXXX号-X. Acceleration can only be created for domains filed in China)
Acceleration Type: Acceleration type, divided into web/download/vod/live streaming/image processing.
- Web acceleration: Generally used for domains with a large number of images and other files*
- Download acceleration: Generally used for large files such as apk installation packages and zip archives;
- Vod acceleration: For video on demand;
- Image processing: For acceleration of specific image domain names. Used with domain names that need to be cropped, watermarked, etc.
Origin domain type: The origin domain type is the Azure service or the customer's origin domain;
Origin domain: The origin domain can be a domain name or IP address. It can also be multiple IP addresses, but for multiple IP addresses only polling can be used; active-standby is not supported. Active-standby return-to-source must be set offline.
Origin Host Header: Set the domain name return-to-source. Only domain names can be used. IP addresses usually aren't used. In general, the origin host header is the same as the accelerated domain or origin domain.
Step 4: Use advanced management features
Once you've created a CDN EndPoint, the Advanced Management Portal not only allows you to perform domain name management such as "disable/enable" and "delete" for CDN EndPoint and handle cache (cache refresh) warmup (content prefetch) operations, but also offers features such as Traffic Report, Bandwidth Report, Cache Refresh, Log Download, and Service Check.
How to enter
Find the created Profiles record in the CDN Profiles list and click on the name
Click Manage in Overview
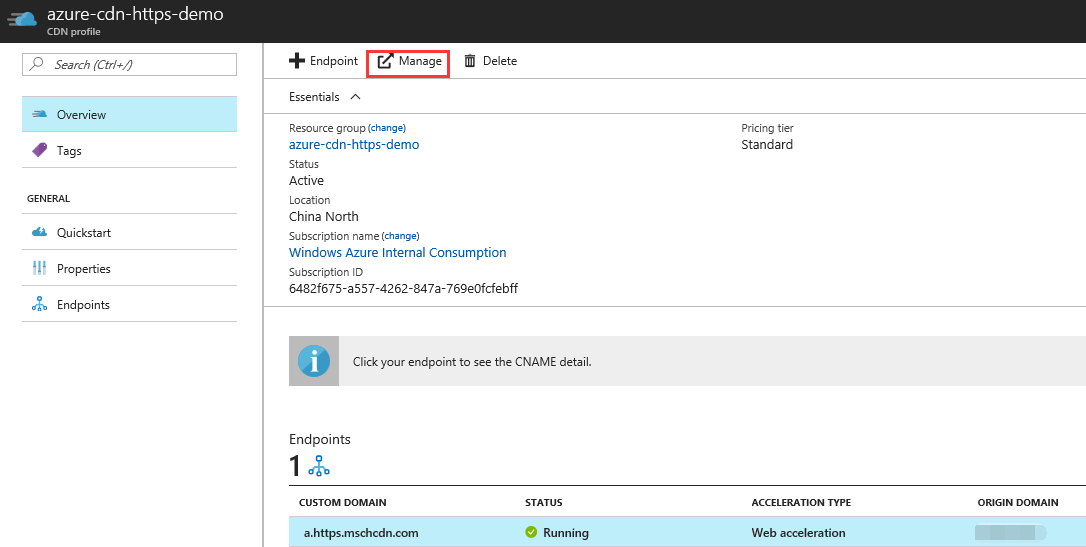
Note
You will be guided to another Content Delivery Network management page, which is not the part of Azure portal. (Ensure that you allow your browser to open the new windows.)
By default, the Portal Overview page is as follows:

Detailed features
Please refer to the New Management Portal Use Guide