Note
Access to this page requires authorization. You can try signing in or changing directories.
Access to this page requires authorization. You can try changing directories.
APPLIES TO:
![]() MongoDB
MongoDB
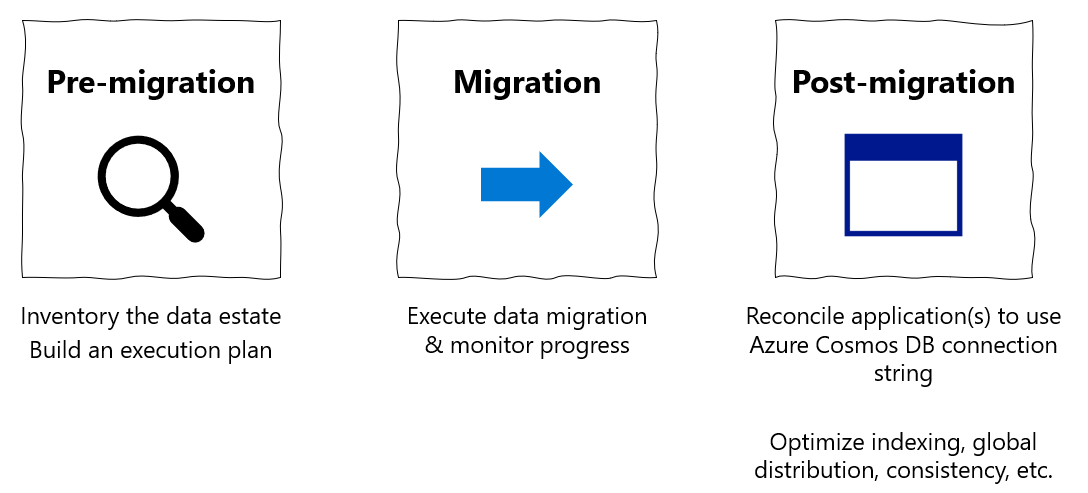
This MongoDB migration guide is part of series on MongoDB migration. The critical MongoDB migration steps are pre-migration, migration, and post-migration, as shown below.
Overview of offline data migration from MongoDB to Azure Cosmos DB using DMS
Use Azure Database Migration Service to perform an offline, one-time migration of databases from an on-premises or cloud instance of MongoDB to Azure Cosmos DB for MongoDB.
In this tutorial, you learn how to:
- Create an instance of Azure Database Migration Service.
- Create a migration project by using Azure Database Migration Service.
- Run the migration.
- Monitor the migration.
In this tutorial, you migrate a dataset in MongoDB that is hosted in an Azure virtual machine. By using Azure Database Migration Service, you migrate the dataset to Azure Cosmos DB for MongoDB. If you don't have a MongoDB source set up already, see Install and configure MongoDB on a Windows VM in Azure.
Prerequisites
To complete this tutorial, you need to:
Complete the pre-migration steps, such as estimating throughput and choosing a partition key.
Create an account for the Azure Cosmos DB for MongoDB.
Note
DMS is currently not supported if you're migrating to an Azure Cosmos DB for MongoDB account that is provisioned with serverless mode.
Create an Azure Virtual Network for Azure Database Migration Service by using Azure Resource Manager. This deployment model provides site-to-site connectivity to your on-premises source servers by using either Azure ExpressRoute or VPN. For more information about creating a virtual network, see the Azure Virtual Network documentation, especially the "quickstart" articles with step-by-step details.
During virtual network setup, if you use ExpressRoute with network peering to Azure, add the following service endpoints to the subnet in which the service will be provisioned:
- Target database endpoint (for example, SQL endpoint or Azure Cosmos DB endpoint)
- Storage endpoint
- Service bus endpoint
This configuration is necessary because Azure Database Migration Service lacks internet connectivity.
Ensure that your network security group (NSG) rules for your virtual network don't block the following communication ports: 53, 443, 445, 9354, and 10000-20000. For more information, see Filter network traffic with network security groups.
Open your Windows Firewall to allow Azure Database Migration Service to access the source MongoDB server, which by default is TCP port 27017.
When you're using a firewall appliance in front of your source database, you might need to add firewall rules to allow Azure Database Migration Service to access the source database for migration.
Configure the Server Side Retry feature
You can benefit from resource governance capabilities if you migrate from MongoDB to Azure Cosmos DB. With these capabilities, you can make full use of your provisioned request units (RU/s) of throughput. Azure Cosmos DB might throttle a particular Database Migration Service request in the course of migration, if that request exceeds the container-provisioned RU/s. Then that request needs to be retried.
Database Migration Service is capable of performing retries. It's important to understand that the round-trip time involved in the network hop between Database Migration Service and Azure Cosmos DB affects the overall response time of that request. Improving response time for throttled requests can shorten the total time needed for migration.
The Server Side Retry feature of Azure Cosmos DB allows the service to intercept throttle error codes and retry with a much lower round-trip time, dramatically improving request response times.
To use Server Side Retry, in the Azure Cosmos DB portal, select Features > Server Side Retry.

If the feature is disabled, select Enable.

Register the resource provider
Register the Microsoft.DataMigration resource provider before you create your first instance of the Database Migration Service.
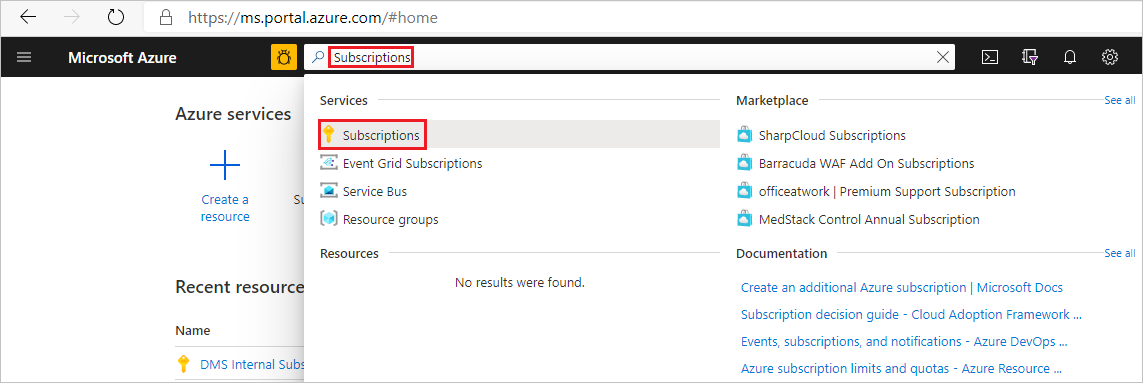
Sign in to the Azure portal. Search for and select Subscriptions.
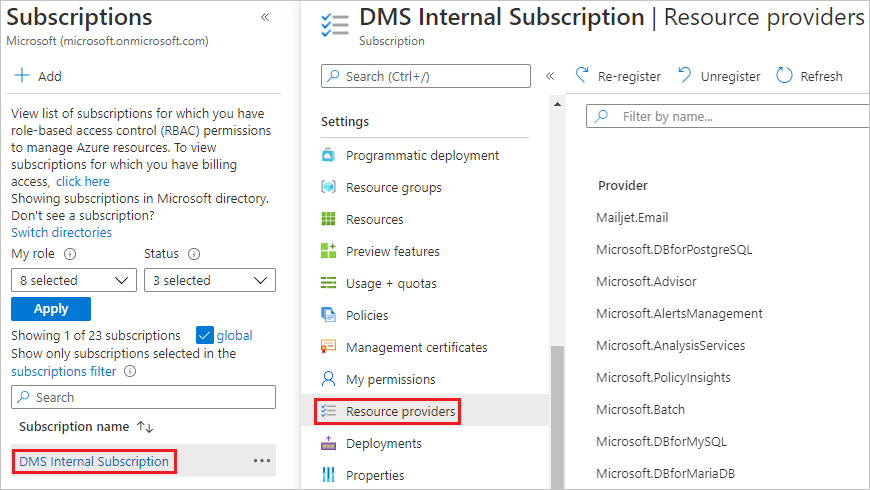
Select the subscription in which you want to create the instance of Azure Database Migration Service, and then select Resource providers.
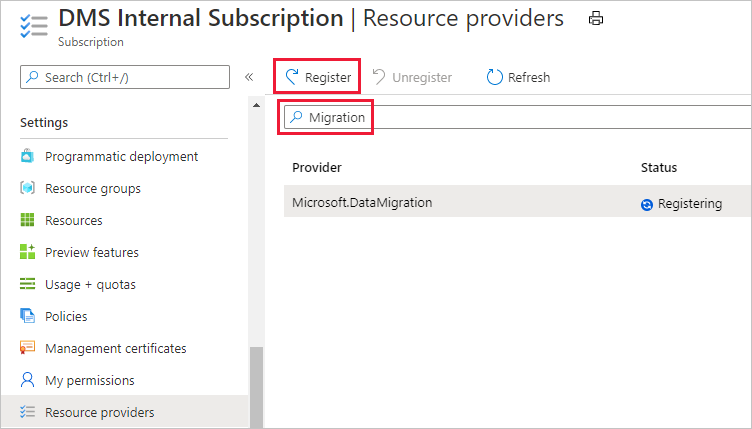
Search for migration, and then select Register for Microsoft.DataMigration.


Create an instance
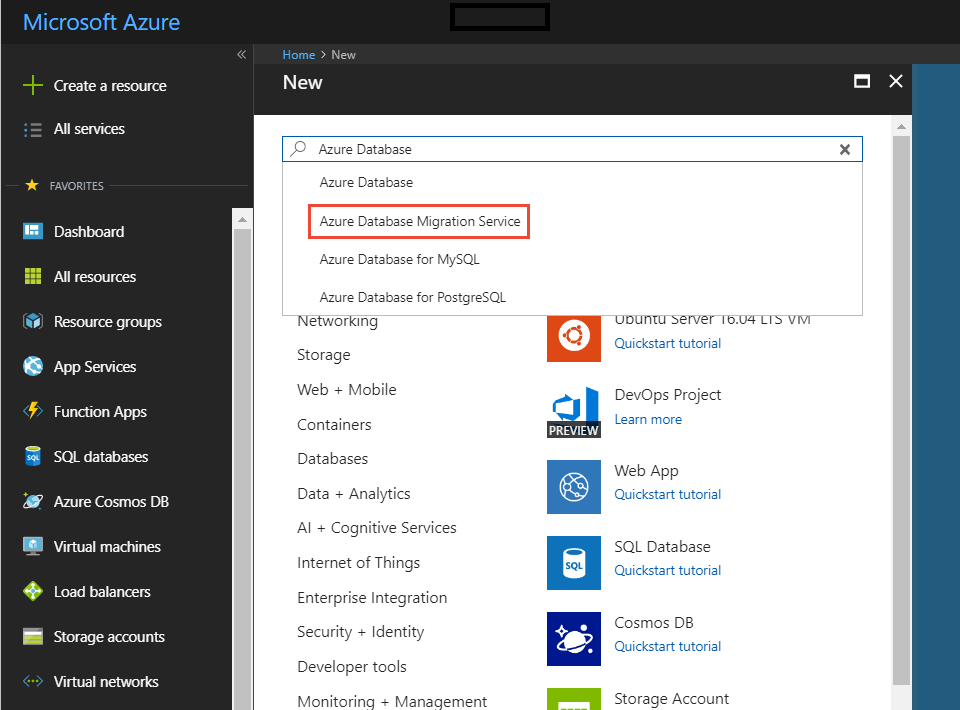
In the Azure portal, select + Create a resource, search for Azure Database Migration Service, and then select Azure Database Migration Service from the dropdown list.
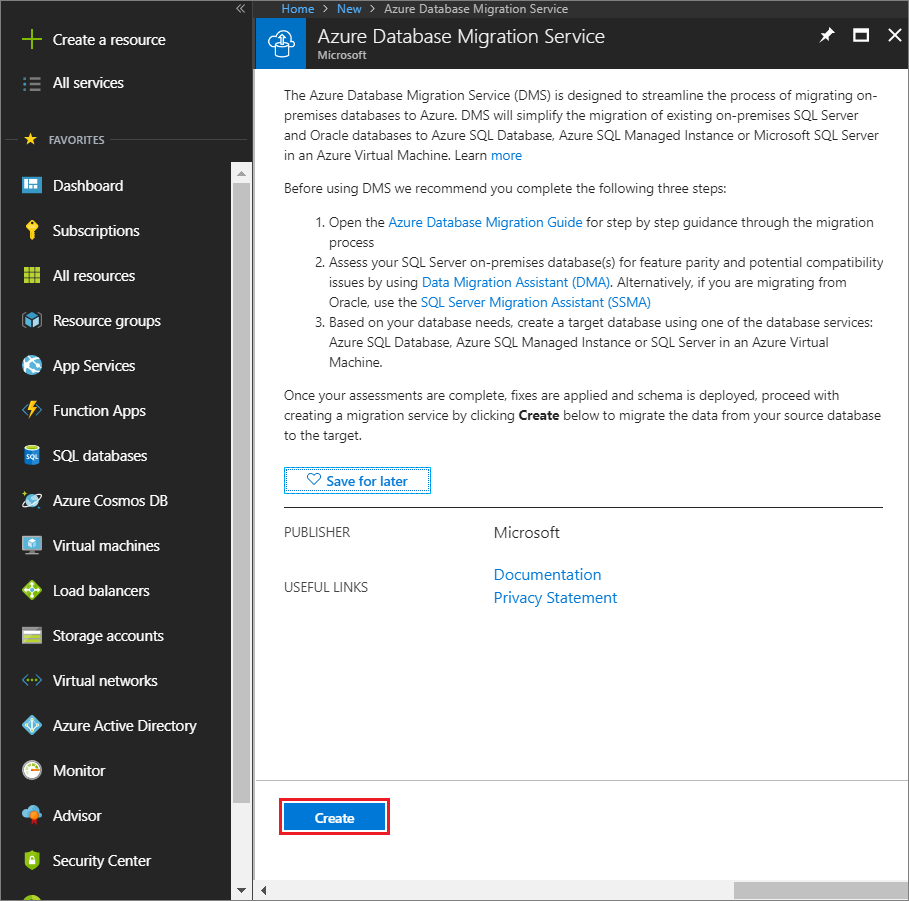
On the Azure Database Migration Service screen, select Create.
On Create Migration Service, specify a name for the service, the subscription, and a new or existing resource group.
Select the location in which you want to create the instance of Azure Database Migration Service.
Select an existing virtual network or create a new one.
The virtual network provides Azure Database Migration Service with access to the source MongoDB instance and the target Azure Cosmos DB account.
For more information about how to create a virtual network in the Azure portal, see Create a virtual network by using the Azure portal.
Select a pricing tier.
For more information on costs and pricing tiers, see the pricing page.
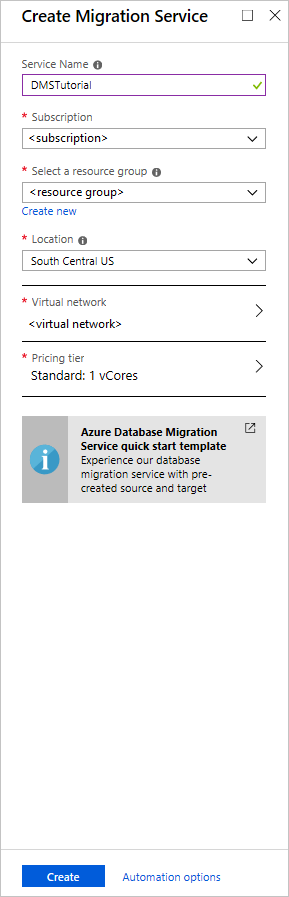
Select Create to create the service.


Create a migration project
After you create the service, locate it within the Azure portal, and open it. Then create a new migration project.
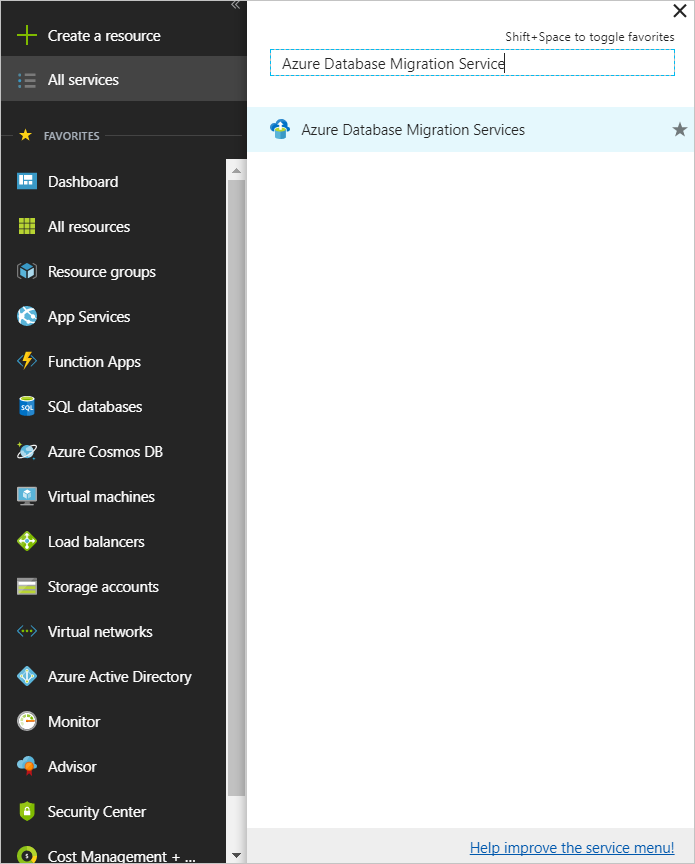
In the Azure portal, select All services, search for Azure Database Migration Service, and then select Azure Database Migration Services.
On the Azure Database Migration Services screen, search for the name of Azure Database Migration Service instance that you created, and then select the instance.
Select + New Migration Project.
On New migration project, specify a name for the project, and in the Source server type text box, select MongoDB. In the Target server type text box, select Azure Cosmos DB for NoSQL, and then for Choose type of activity, select Offline data migration.
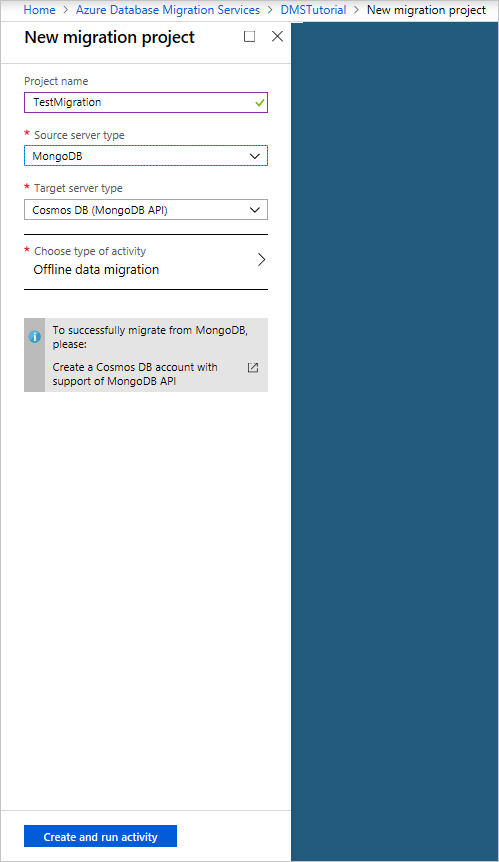
Select Create and run activity to create the project and run the migration activity.
Specify source details
On the Source details screen, specify the connection details for the source MongoDB server.
Important
Azure Database Migration Service doesn't support Azure Cosmos DB as a source.
There are three modes to connect to a source:
Standard mode, which accepts a fully qualified domain name or an IP address, port number, and connection credentials.
Connection string mode, which accepts a MongoDB connection string as described in Connection String URI Format.
Data from Azure storage, which accepts a blob container SAS URL. Select Blob contains BSON dumps if the blob container has BSON dumps produced by the MongoDB bsondump tool. Don't select this option if the container contains JSON files.
If you select this option, be sure that the storage account connection string appears in the following format:
https://blobnameurl/container?SASKEYYou can find this blob container SAS connection string in Azure Storage explorer. Creating the SAS for the concerned container provides you with the URL in the requested format.
Also, based on the type dump information in Azure Storage, keep the following in mind:
For BSON dumps, the data within the blob container must be in the bsondump format. Place data files into folders named after the containing databases in the format collection.bson. Name any metadata files by using the format collection.metadata.json.
For JSON dumps, the files in the blob container must be placed into folders named after the containing databases. Within each database folder, data files must be placed in a subfolder called data, and named by using the format collection.json. Place any metadata files in a subfolder called metadata, and named by using the same format, collection.json. The metadata files must be in the same format as produced by the MongoDB bsondump tool.
Important
We don't recommend that you use a self-signed certificate on the MongoDB server. If you must use one, connect to the server by using the connection string mode, and ensure that your connection string has quotation marks ("").
&sslVerifyCertificate=false
You can also use the IP address for situations in which DNS name resolution isn't possible.
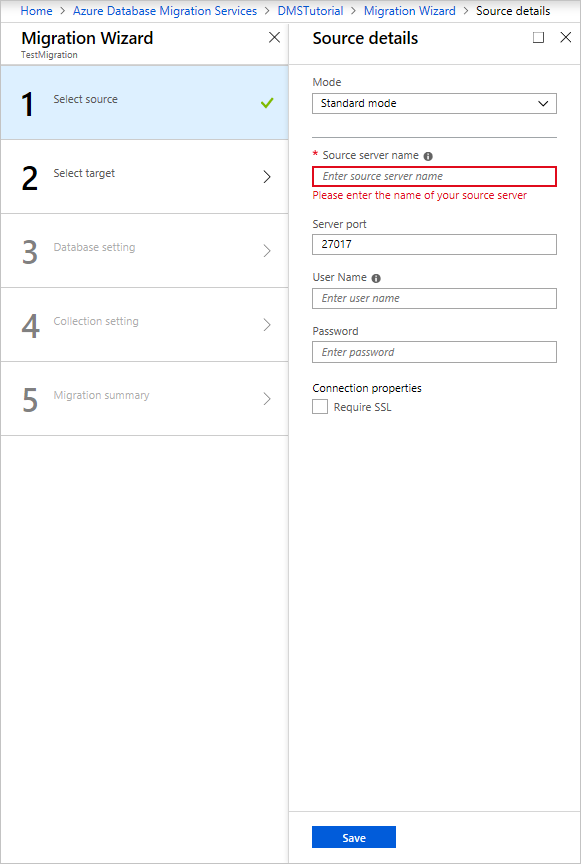
Select Save.
Specify target details
On the Migration target details screen, specify the connection details for the target Azure Cosmos DB account. This account is the pre-provisioned Azure Cosmos DB for MongoDB account to which you're migrating your MongoDB data.
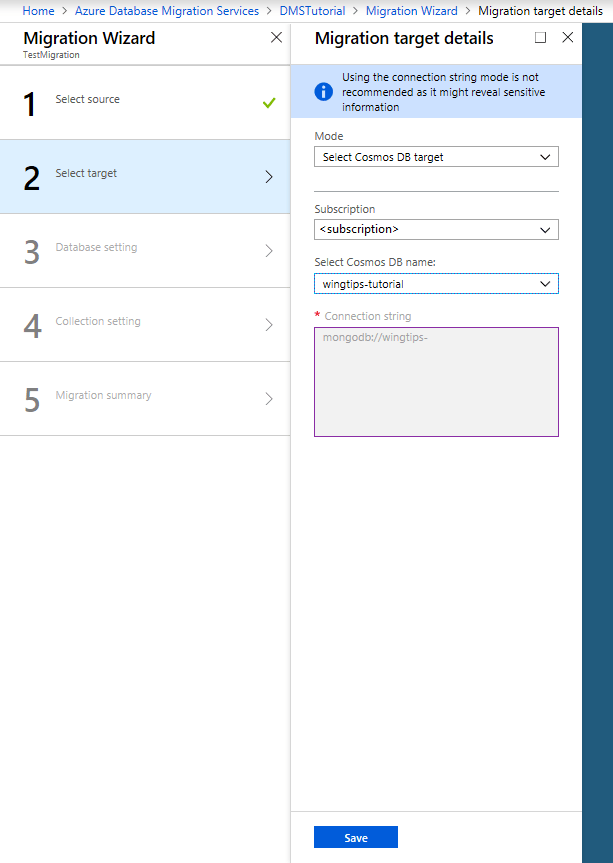
Select Save.
Map to target databases
On the Map to target databases screen, map the source and the target database for migration.
If the target database contains the same database name as the source database, Azure Database Migration Service selects the target database by default.
If Create appears next to the database name, it indicates that Azure Database Migration Service didn't find the target database, and the service will create the database for you.
At this point in the migration, you can provision throughput. In Azure Cosmos DB, you can provision throughput either at the database level or individually for each collection. Throughput is measured in request units. Learn more about Azure Cosmos DB pricing.
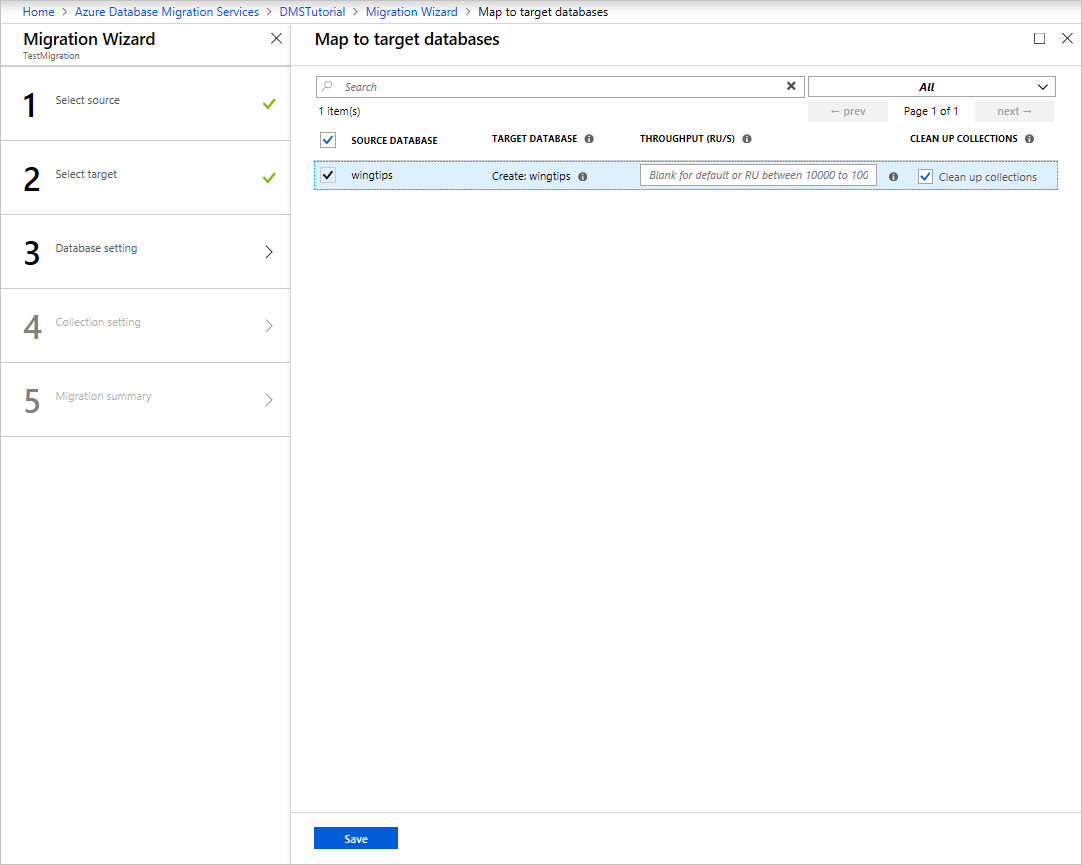
Select Save.
On the Collection setting screen, expand the collections listing, and then review the list of collections that will be migrated.
Azure Database Migration Service automatically selects all the collections that exist on the source MongoDB instance that don't exist on the target Azure Cosmos DB account. If you want to remigrate collections that already include data, you need to explicitly select the collections on this pane.
You can specify the number of RUs that you want the collections to use. Azure Database Migration Service suggests smart defaults based on the collection size.
Note
Perform the database migration and collection in parallel. If necessary, you can use multiple instances of Azure Database Migration Service to speed up the run.
You can also specify a shard key to take advantage of partitioning in Azure Cosmos DB for optimal scalability. Review the best practices for selecting a shard/partition key.
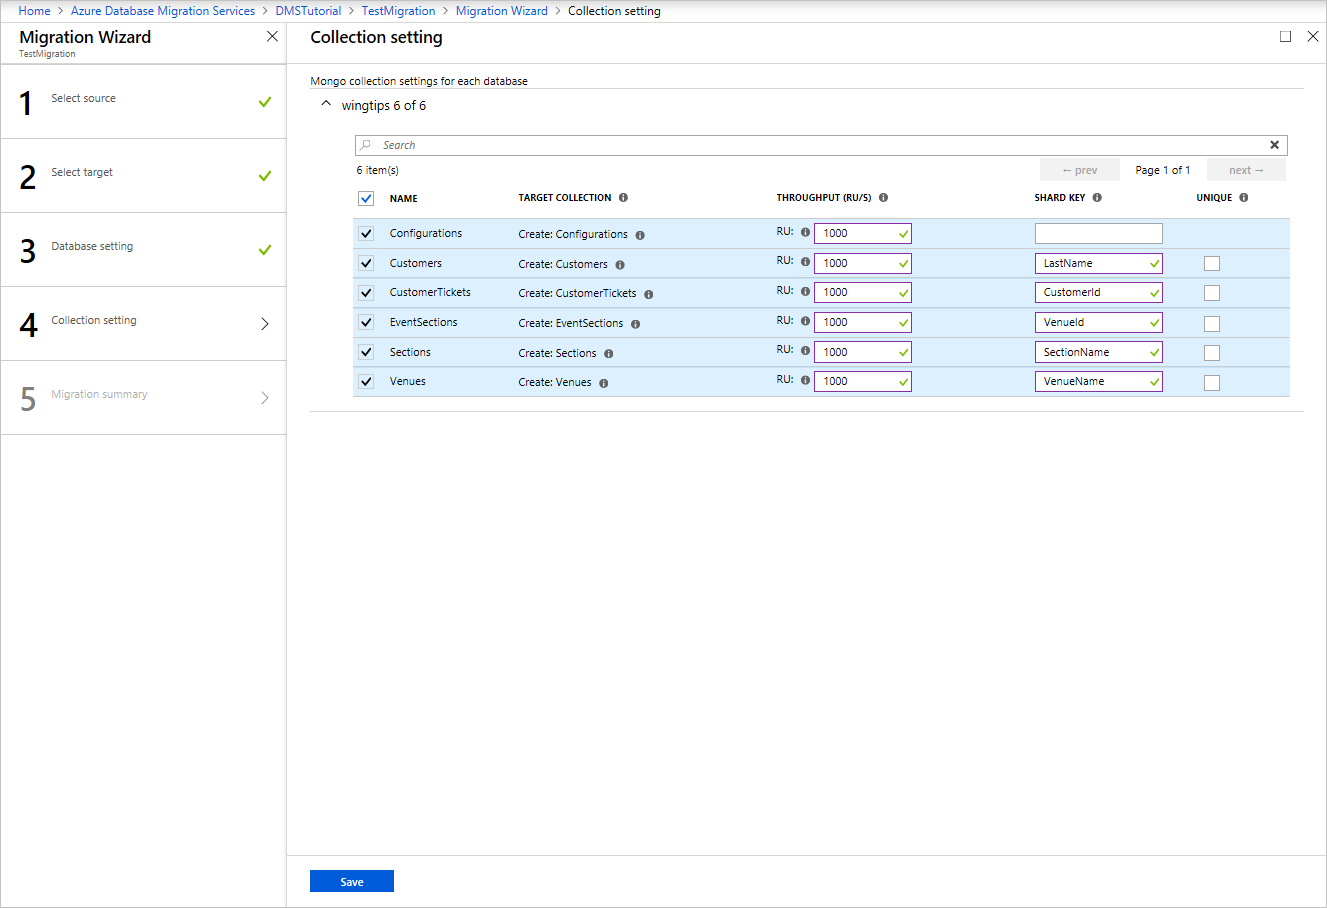
Select Save.
On the Migration summary screen, in the Activity name text box, specify a name for the migration activity.
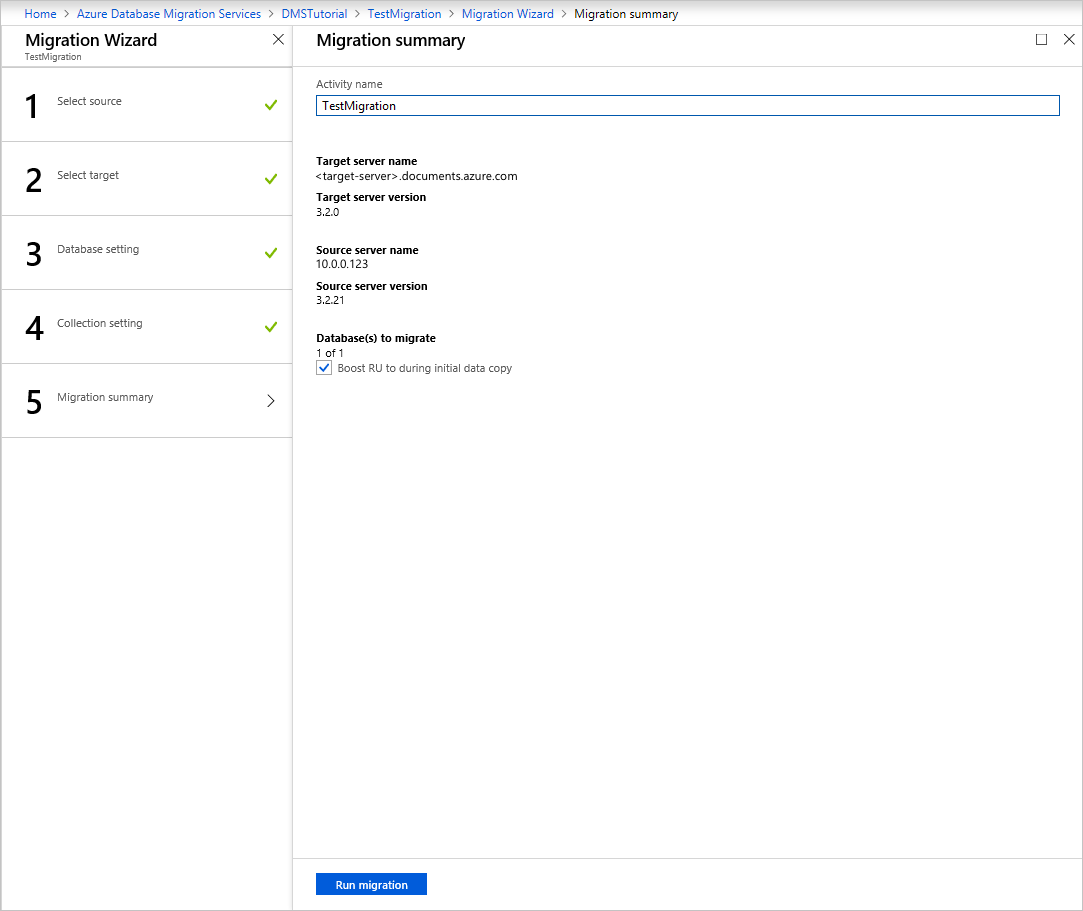


Run the migration
Select Run migration. The migration activity window appears, and the status of the activity is Not started.
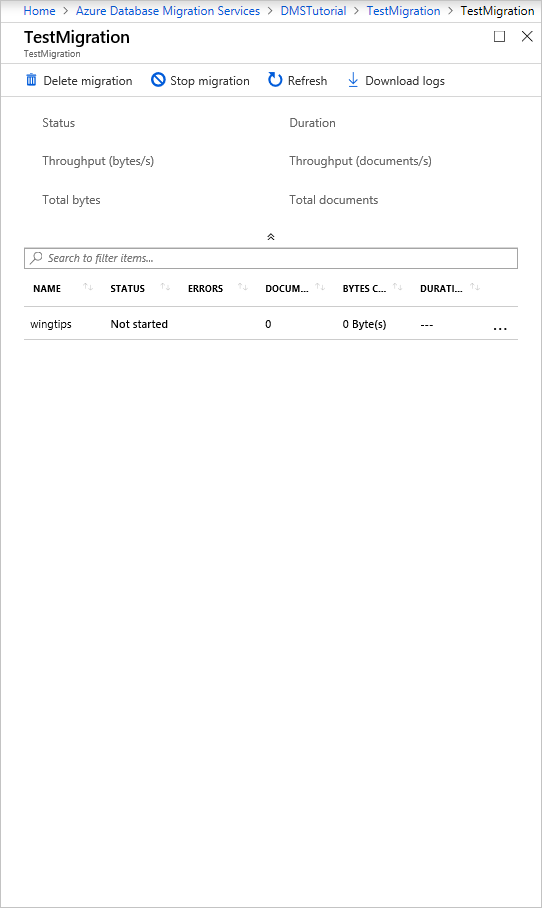
Monitor the migration
On the migration activity screen, select Refresh to update the display until the status of the migration shows as Completed.
Note
You can select the activity to get details of database- and collection-level migration metrics.
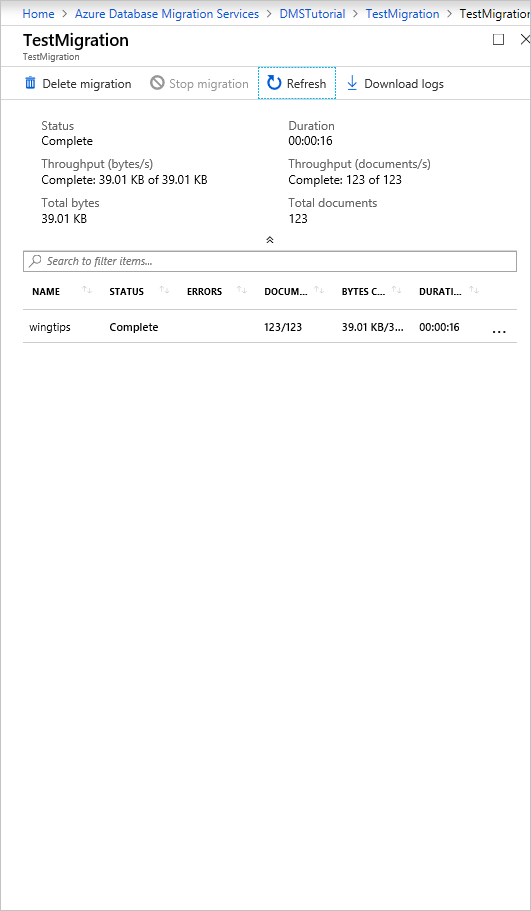
Verify data in Azure Cosmos DB
After the migration finishes, you can check your Azure Cosmos DB account to verify that all the collections were migrated successfully.

Post-migration optimization
After you migrate the data stored in MongoDB database to the Azure Cosmos DB for MongoDB, you can connect to Azure Cosmos DB and manage the data. You can also perform other post-migration optimization steps. These might include optimizing the indexing policy, updating the default consistency level, or configuring global distribution for your Azure Cosmos DB account. For more information, see Post-migration optimization.
Additional resources
Trying to do capacity planning for a migration to Azure Cosmos DB?
- If all you know is the number of vCores and servers in your existing database cluster, read about estimating request units using vCores or vCPUs
- If you know typical request rates for your current database workload, read about estimating request units using Azure Cosmos DB capacity planner