Applies to: ✔️ Linux VMs ✔️ Windows VMs ✔️
Azure Disk Storage supports double encryption at rest for managed disks. For conceptual information on double encryption at rest, and other managed disk encryption types, see the Double encryption at rest section of our disk encryption article.
Restrictions
Double encryption at rest isn't currently supported with either Ultra Disks or Premium SSD v2 disks.
Prerequisites
If you're going to use Azure CLI, install the latest Azure CLI and sign in to an Azure account with az login.
If you're going to use Azure PowerShell, install the latest Azure PowerShell version, and sign in to an Azure account by using Connect-AzAccount.
If you create a key vault, enable soft delete and purge protection. Soft delete retains a deleted key for the retention period, which is 90 days by default. Purge protection prevents permanent deletion until that period ends. Both settings are mandatory when you use Azure Key Vault to encrypt managed disks.
Enable double encryption at rest
Enable double encryption in the Azure portal
Sign in to the Azure portal.
Search for and select Disk Encryption Sets.
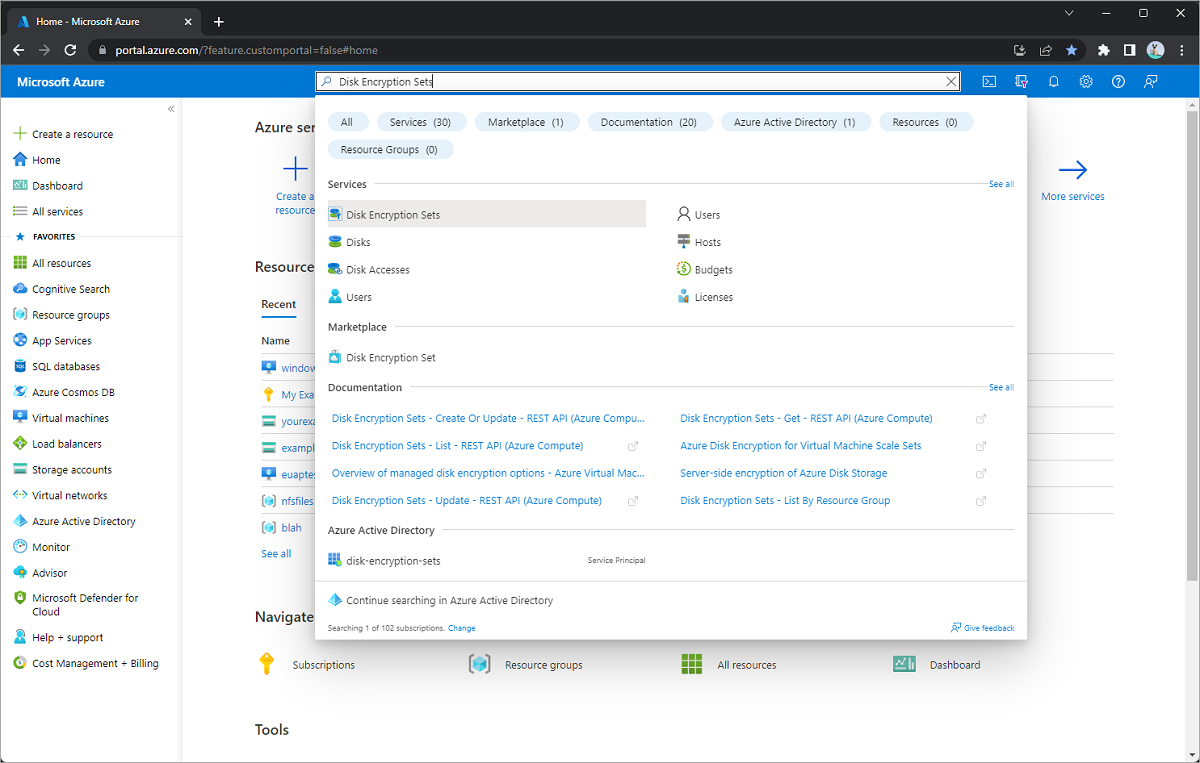
Select + Create.
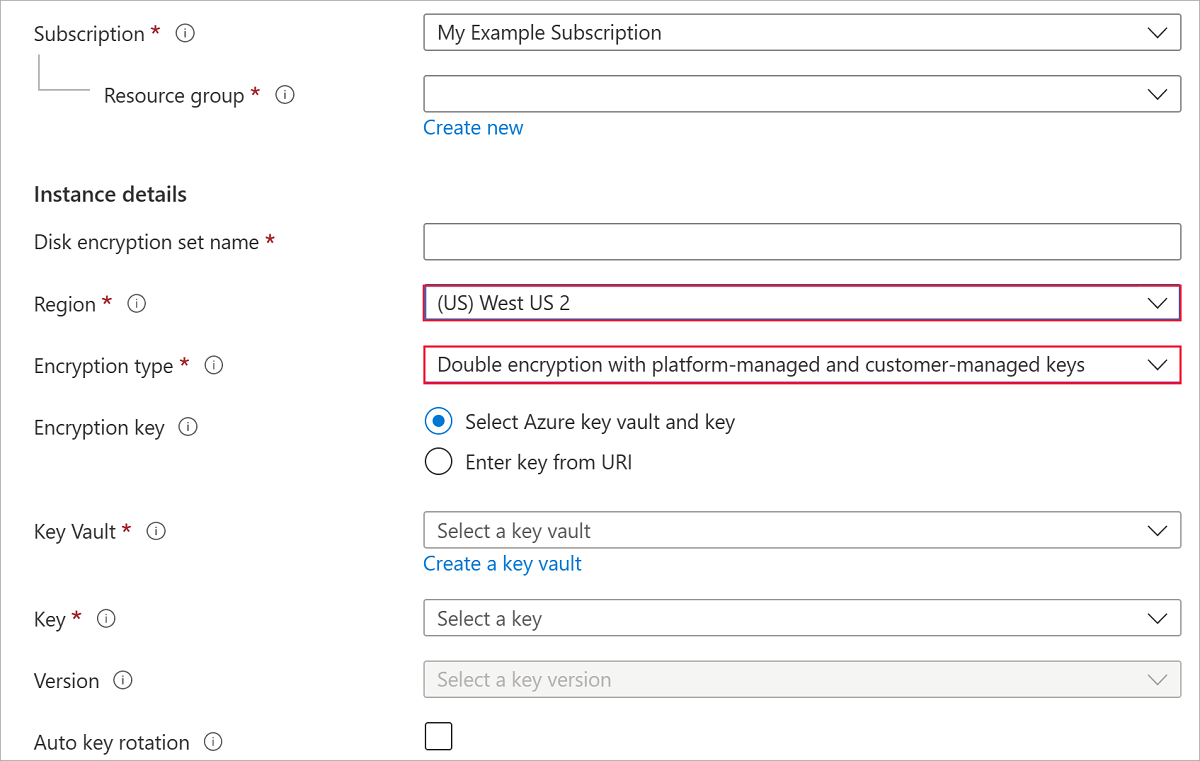
Select one of the supported regions.
For Encryption type, select Double encryption with platform-managed and customer-managed keys.
Note
Once you create a disk encryption set with a particular encryption type, it cannot be changed. If you want to use a different encryption type, you must create a new disk encryption set.
Fill in the remaining info.
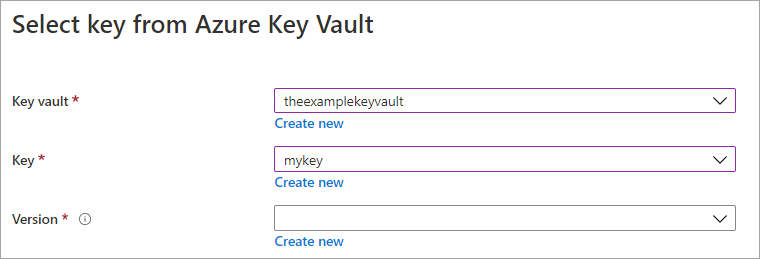
Select an Azure Key Vault and key, or create a new one if necessary.
Note
If you create a key vault, enable soft delete and purge protection as described in the prerequisites.
Select Create.
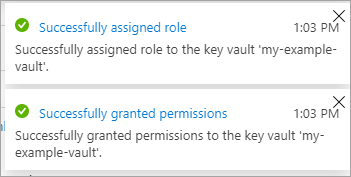
Navigate to the disk encryption set you created, and then select the alert to grant the required key vault permissions.

The notifications confirm that the role was assigned and the key vault permissions were granted.
Navigate to your disk.
Select Encryption.
For Encryption type, select Double encryption with platform-managed and customer-managed keys.
Select your disk encryption set.
select Save.
You have now enabled double encryption at rest on your managed disk.
Enable double encryption with Azure CLI
Create a key vault and encryption key.
Use az account set to select the subscription, az keyvault create to create a key vault with soft delete and purge protection enabled, and az keyvault key create to create the encryption key.
subscriptionId=yourSubscriptionID
rgName=yourResourceGroupName
location=chinanorth2
keyVaultName=yourKeyVaultName
keyName=yourKeyName
diskEncryptionSetName=yourDiskEncryptionSetName
diskName=yourDiskName

az account set --subscription $subscriptionId

az keyvault create -n $keyVaultName -g $rgName -l $location --enable-purge-protection true --enable-soft-delete true

az keyvault key create --vault-name $keyVaultName -n $keyName --protection software
Use az keyvault key show to get the URL of the key you created.
az keyvault key show --name $keyName --vault-name $keyVaultName
Use az disk-encryption-set create to create a disk encryption set with the encryption type set to EncryptionAtRestWithPlatformAndCustomerKeys. Replace yourKeyURL with the URL returned by az keyvault key show.
az disk-encryption-set create --resource-group $rgName --name $diskEncryptionSetName --key-url yourKeyURL --source-vault $keyVaultName --encryption-type EncryptionAtRestWithPlatformAndCustomerKeys
Grant the disk encryption set access to the key vault. Use az disk-encryption-set show to get its principal ID and az keyvault set-policy to grant the required key permissions.
Note
It might take a few minutes for Azure to create the identity of your disk encryption set in Microsoft Entra ID. If the command returns a "Cannot find the Active Directory object" error, wait a few minutes and try again.
desIdentity=$(az disk-encryption-set show -n $diskEncryptionSetName -g $rgName --query [identity.principalId] -o tsv)

az keyvault set-policy -n $keyVaultName -g $rgName --object-id $desIdentity --key-permissions wrapkey unwrapkey get
Apply the disk encryption set to the managed disk. The disk must not be attached to a running VM. Use az disk update to configure double encryption, then use az disk show to verify the encryption type.
diskEncryptionSetId=$(az disk-encryption-set show -n $diskEncryptionSetName -g $rgName --query [id] -o tsv)

az disk update -n $diskName -g $rgName \
  --encryption-type EncryptionAtRestWithPlatformAndCustomerKeys \
  --disk-encryption-set $diskEncryptionSetId

az disk show -n $diskName -g $rgName --query encryption.type -o tsv
Verify that the command returns EncryptionAtRestWithPlatformAndCustomerKeys.
Enable double encryption with Azure PowerShell
Create a key vault and encryption key.
Use New-AzKeyVault to create a key vault with soft delete and purge protection enabled, then use Add-AzKeyVaultKey to create the encryption key.
$ResourceGroupName="yourResourceGroupName"
$LocationName="chinanorth2"
$keyVaultName="yourKeyVaultName"
$keyName="yourKeyName"
$keyDestination="Software"
$diskEncryptionSetName="yourDiskEncryptionSetName"
$diskName="yourDiskName"

$keyVault = New-AzKeyVault -Name $keyVaultName -ResourceGroupName $ResourceGroupName -Location $LocationName -EnableSoftDelete -EnablePurgeProtection

$key = Add-AzKeyVaultKey -VaultName $keyVaultName -Name $keyName -Destination $keyDestination
Use Get-AzKeyVaultKey to retrieve the key URL for subsequent commands.
Get-AzKeyVaultKey -VaultName $keyVaultName -KeyName $keyName
Use Get-AzKeyVault to retrieve the key vault resource ID for subsequent commands.
Get-AzKeyVault -VaultName $keyVaultName
Use New-AzDiskEncryptionSetConfig and New-AzDiskEncryptionSet to create a disk encryption set with the encryption type set to EncryptionAtRestWithPlatformAndCustomerKeys. Replace yourKeyURL and yourKeyVaultURL with the values retrieved earlier.
$config = New-AzDiskEncryptionSetConfig -Location $locationName -KeyUrl "yourKeyURL" -SourceVaultId 'yourKeyVaultURL' -IdentityType 'SystemAssigned'

$config | New-AzDiskEncryptionSet -ResourceGroupName $ResourceGroupName -Name $diskEncryptionSetName -EncryptionType EncryptionAtRestWithPlatformAndCustomerKeys
Grant the disk encryption set access to the key vault. Use Get-AzDiskEncryptionSet to get its identity and Set-AzKeyVaultAccessPolicy to grant the required key permissions.
Note
It might take a few minutes for Azure to create the identity of your disk encryption set in Microsoft Entra ID. If the command returns a "Cannot find the Active Directory object" error, wait a few minutes and try again.
$des=Get-AzDiskEncryptionSet -name $diskEncryptionSetName -ResourceGroupName $ResourceGroupName
Set-AzKeyVaultAccessPolicy -VaultName $keyVaultName -ObjectId $des.Identity.PrincipalId -PermissionsToKeys wrapkey,unwrapkey,get
Apply the disk encryption set to the managed disk. The disk must not be attached to a running VM. Use New-AzDiskUpdateConfig and Update-AzDisk to configure double encryption, then use Get-AzDisk to verify the encryption type.
$diskEncryptionSet = Get-AzDiskEncryptionSet -ResourceGroupName $ResourceGroupName -Name $diskEncryptionSetName

New-AzDiskUpdateConfig `
    -EncryptionType "EncryptionAtRestWithPlatformAndCustomerKeys" `
    -DiskEncryptionSetId $diskEncryptionSet.Id | `
    Update-AzDisk -ResourceGroupName $ResourceGroupName -DiskName $diskName

$disk = Get-AzDisk -ResourceGroupName $ResourceGroupName -DiskName $diskName
$disk.Encryption.Type
Verify that the command returns EncryptionAtRestWithPlatformAndCustomerKeys.
Next steps
