使用 Azure PowerShell 创建公共负载均衡器和两个虚拟机,通过这种方式开始使用 Azure 负载均衡器。
必备条件
具有活动订阅的 Azure 帐户。 创建试用版订阅
在本地安装了 Azure PowerShell。
如果选择在本地安装并使用 PowerShell,则本文需要 Azure PowerShell 模块 5.4.1 或更高版本。 运行 Get-Module -ListAvailable Az 查找已安装的版本。 如果需要进行升级,请参阅 Install Azure PowerShell module(安装 Azure PowerShell 模块)。 如果在本地运行 PowerShell,则还需运行 Connect-AzAccount -Environment AzureChinaCloud 以创建与 Azure 的连接。
创建资源组
Azure 资源组是在其中部署和管理 Azure 资源的逻辑容器。
使用 New-AzResourceGroup 创建资源组:
$rg = @{
    Name = 'CreatePubLBQS-rg'
    Location = 'chinanorth3'
}
New-AzResourceGroup @rg
创建公共 IP 地址
使用 New-AzPublicIpAddress 创建公共 IP 地址。
$publicip = @{
    Name = 'myPublicIP'
    ResourceGroupName = $rg.name
    Location = 'chinanorth3'
    Sku = 'Standard'
    AllocationMethod = 'static'
    Zone = 1,2,3
}
New-AzPublicIpAddress @publicip
若要在区域 1 中创建区域性公共 IP 地址,请使用以下命令:
$publicip = @{
    Name = 'myPublicIP'
    ResourceGroupName = $rg.name
    Location = 'chinanorth3'
    Sku = 'Standard'
    AllocationMethod = 'static'
    Zone = 1
}
New-AzPublicIpAddress @publicip
创建负载均衡器
本部分详细介绍如何创建和配置负载均衡器的以下组件:
使用 New-AzLoadBalancerFrontendIpConfig 为前端 IP 池创建前端 IP。 此 IP 在负载均衡器上接收传入流量
使用 New-AzLoadBalancerBackendAddressPoolConfig 为从负载均衡器前端发送的流量创建后端地址池。 此池是部署后端虚拟机的位置
使用 Add-AzLoadBalancerProbeConfig 创建运行状况探测,用于确定后端 VM 实例的运行状况
使用 Add-AzLoadBalancerRuleConfig 创建负载均衡器规则,用于定义流量分发到 VM 的方式
使用 New-AzLoadBalancer 创建公共负载均衡器
## Place public IP created in previous steps into variable. ##
$pip = @{
    Name = 'myPublicIP'
    ResourceGroupName = $rg.name
}
$publicIp = Get-AzPublicIpAddress @pip

## Create load balancer frontend configuration and place in variable. ##
$fip = @{
    Name = 'myFrontEnd'
    PublicIpAddress = $publicIp
}
$feip = New-AzLoadBalancerFrontendIpConfig @fip

## Create backend address pool configuration and place in variable. ##
$bepool = New-AzLoadBalancerBackendAddressPoolConfig -Name 'myBackEndPool'

## Create the health probe and place in variable. ##
$probe = @{
    Name = 'myHealthProbe'
    Protocol = 'tcp'
    Port = '80'
    IntervalInSeconds = '360'
    ProbeCount = '5'
}
$healthprobe = New-AzLoadBalancerProbeConfig @probe

## Create the load balancer rule and place in variable. ##
$lbrule = @{
    Name = 'myHTTPRule'
    Protocol = 'tcp'
    FrontendPort = '80'
    BackendPort = '80'
    IdleTimeoutInMinutes = '15'
    FrontendIpConfiguration = $feip
    BackendAddressPool = $bePool
}
$rule = New-AzLoadBalancerRuleConfig @lbrule -EnableTcpReset -DisableOutboundSNAT

## Create the load balancer resource. ##
$loadbalancer = @{
    ResourceGroupName = $rg.name
    Name = 'myLoadBalancer'
    Location = 'chinanorth3'
    Sku = 'Standard'
    FrontendIpConfiguration = $feip
    BackendAddressPool = $bePool
    LoadBalancingRule = $rule
    Probe = $healthprobe
}
New-AzLoadBalancer @loadbalancer
配置虚拟网络
需要先创建支持的虚拟网络资源,然后才能部署 VM 和测试负载均衡器。
为后端虚拟机创建虚拟网络。
创建网络安全组,以定义虚拟网络的入站连接。
创建 Azure 堡垒主机安全管理后端池中的虚拟机。
使用 NAT 网关提供对负载均衡器后端池中资源的出站 Internet 访问。
创建虚拟网络、网络安全组、堡垒主机和 NAT 网关
使用 New-AzVirtualNetwork 创建虚拟网络
使用 New-AzNetworkSecurityRuleConfig 创建网络安全组规则
使用 New-AzBastion 创建 Azure 堡垒主机
使用 New-AzNetworkSecurityGroup 创建网络安全组
使用 New-AzNatGateway 创建 NAT 网关资源
使用 AzVirtualNetworkSubnetConfig 将 NAT 网关关联到虚拟网络的子网
重要
小时定价从部署 Bastion 的时刻开始计算,而无论出站数据使用情况如何。 有关详细信息,请参阅定价和 SKU。 如果要将 Bastion 部署为教程或测试的一部分,建议在使用完此资源后将其删除。
## Create public IP address for NAT gateway ##
$ip = @{
    Name = 'myNATgatewayIP'
    ResourceGroupName = $rg.name
    Location = 'chinanorth3'
    Sku = 'Standard'
    AllocationMethod = 'Static'
}
$publicIP = New-AzPublicIpAddress @ip

## Create NAT gateway resource ##
$nat = @{
    ResourceGroupName = $rg.name
    Name = 'myNATgateway'
    IdleTimeoutInMinutes = '10'
    Sku = 'Standard'
    Location = 'chinanorth3'
    PublicIpAddress = $publicIP
}
$natGateway = New-AzNatGateway @nat

## Create backend subnet config ##
$subnet = @{
    Name = 'myBackendSubnet'
    AddressPrefix = '10.1.0.0/24'
    NatGateway = $natGateway
}
$subnetConfig = New-AzVirtualNetworkSubnetConfig @subnet

## Create Azure Bastion subnet. ##
$bastsubnet = @{
    Name = 'AzureBastionSubnet'
    AddressPrefix = '10.1.1.0/24'
}
$bastsubnetConfig = New-AzVirtualNetworkSubnetConfig @bastsubnet

## Create the virtual network ##
$net = @{
    Name = 'myVNet'
    ResourceGroupName = $rg.name
    Location = 'chinanorth3'
    AddressPrefix = '10.1.0.0/16'
    Subnet = $subnetConfig,$bastsubnetConfig
}
$vnet = New-AzVirtualNetwork @net

## Create public IP address for bastion host. ##
$ip = @{
    Name = 'myBastionIP'
    ResourceGroupName = $rg.name
    Location = 'chinanorth3'
    Sku = 'Standard'
    AllocationMethod = 'Static'
}
$publicip = New-AzPublicIpAddress @ip

## Create bastion host ##
$bastion = @{
    ResourceGroupName = $rg.name
    Name = 'myBastion'
    PublicIpAddress = $publicip
    VirtualNetwork = $vnet
}
New-AzBastion @bastion -AsJob

## Create rule for network security group and place in variable. ##
$nsgrule = @{
    Name = 'myNSGRuleHTTP'
    Description = 'Allow HTTP'
    Protocol = '*'
    SourcePortRange = '*'
    DestinationPortRange = '80'
    SourceAddressPrefix = 'Internet'
    DestinationAddressPrefix = '*'
    Access = 'Allow'
    Priority = '2000'
    Direction = 'Inbound'
}
$rule1 = New-AzNetworkSecurityRuleConfig @nsgrule

## Create network security group ##
$nsg = @{
    Name = 'myNSG'
    ResourceGroupName = $rg.name
    Location = 'chinanorth3'
    SecurityRules = $rule1
}
New-AzNetworkSecurityGroup @nsg
创建虚拟机
在本部分中,将为负载均衡器的后端池创建两个虚拟机。
使用 New-AzNetworkInterface 创建两个网络接口
使用 Get-Credential 设置 VM 的管理员用户名和密码
使用以下命令创建虚拟机:
# Set the administrator and password for the VMs. ##
$cred = Get-Credential

## Place the virtual network into a variable. ##
$net = @{
    Name = 'myVNet'
    ResourceGroupName = $rg.name
}
$vnet = Get-AzVirtualNetwork @net

## Place the load balancer into a variable. ##
$lb = @{
    Name = 'myLoadBalancer'
    ResourceGroupName = $rg.name
}
$bepool = Get-AzLoadBalancer @lb  | Get-AzLoadBalancerBackendAddressPoolConfig

## Place the network security group into a variable. ##
$ns = @{
    Name = 'myNSG'
    ResourceGroupName = $rg.name
}
$nsg = Get-AzNetworkSecurityGroup @ns

## For loop with variable to create virtual machines for load balancer backend pool. ##
for ($i=1; $i -le 2; $i++){

    ## Command to create network interface for VMs ##
    $nic = @{
        Name = "myNicVM$i"
        ResourceGroupName = $rg.name
        Location = 'chinanorth3'
        Subnet = $vnet.Subnets[0]
        NetworkSecurityGroup = $nsg
        LoadBalancerBackendAddressPool = $bepool
    }
    $nicVM = New-AzNetworkInterface @nic

    ## Create a virtual machine configuration for VMs ##
    $vmsz = @{
        VMName = "myVM$i"
        VMSize = 'Standard_DS1_v2'
    }
    $vmos = @{
        ComputerName = "myVM$i"
        Credential = $cred
    }
    $vmimage = @{
        PublisherName = 'MicrosoftWindowsServer'
        Offer = 'WindowsServer'
        Skus = '2019-Datacenter'
        Version = 'latest'
    }
    $vmConfig = New-AzVMConfig @vmsz `
        | Set-AzVMOperatingSystem @vmos -Windows `
        | Set-AzVMSourceImage @vmimage `
        | Add-AzVMNetworkInterface -Id $nicVM.Id

    ## Create the virtual machine for VMs ##
    $vm = @{
        ResourceGroupName = $rg.name
        Location = 'chinanorth3'
        VM = $vmConfig
        Zone = "$i"
    }
    New-AzVM @vm -AsJob
}
虚拟机和堡垒主机的部署将作为 PowerShell 作业提交。 若要查看作业的状态,请使用 Get-Job:
Get-Job

Id     Name            PSJobTypeName   State         HasMoreData     Location             Command
-- ----            ------------- -----         ----------- --------             -------
1      Long Running O… AzureLongRunni… Completed     True            localhost            New-AzBastion
2      Long Running O… AzureLongRunni… Completed     True            localhost            New-AzVM
3      Long Running O… AzureLongRunni… Completed     True            localhost            New-AzVM
在继续执行后续步骤之前,请确保 VM 创建的状态为“已完成”。
注意
Azure 会为未分配公共 IP 地址的 VM 或位于内部基本 Azure 负载均衡器的后端池中的 VM 提供默认出站访问 IP。 默认出站访问 IP 机制会提供不可配置的出站 IP 地址。
发生以下事件之一时,将禁用默认出站访问 IP:
- 将公共 IP 地址分配给 VM。
- 虚拟机被放置在标准负载平衡器的后端池中,有无出站规则均可。
- 向 VM 的子网分配了 Azure NAT 网关资源。
在灵活业务流程模式下通过使用虚拟机规模集创建的 VM 没有默认的出站访问权限。
有关 Azure 中的出站连接的详细信息,请参阅 Azure 中的默认出站访问权限和使用用于出站连接的源网络地址转换 (SNAT)。
安装 IIS
使用 Set-AzVMExtension 安装自定义脚本扩展。
该扩展运行 PowerShell Add-WindowsFeature Web-Server 来安装 IIS Web 服务器,然后更新 Default.htm 页以显示 VM 的主机名:
重要
在继续操作之前,请确保已在前面的步骤中完成虚拟机部署。 使用 Get-Job 来检查虚拟机部署作业的状态。
## For loop with variable to install custom script extension on virtual machines. ##
for ($i=1; $i -le 2; $i++)
{
$ext = @{
    Publisher = 'Microsoft.Compute'
    ExtensionType = 'CustomScriptExtension'
    ExtensionName = 'IIS'
    ResourceGroupName = $rg.name
    VMName = "myVM$i"
    Location = 'chinanorth3'
    TypeHandlerVersion = '1.8'
    SettingString = '{"commandToExecute":"powershell Add-WindowsFeature Web-Server; powershell Add-Content -Path \"C:\\inetpub\\wwwroot\\Default.htm\" -Value $($env:computername)"}'
}
Set-AzVMExtension @ext -AsJob
}
扩展部署为 PowerShell 作业。 若要查看安装作业的状态,请使用 Get-Job:
Get-Job

Id     Name            PSJobTypeName   State         HasMoreData     Location             Command
-- ----            ------------- -----         ----------- --------             -------
8      Long Running O… AzureLongRunni… Running       True            localhost            Set-AzVMExtension
9      Long Running O… AzureLongRunni… Running       True            localhost            Set-AzVMExtension
在继续执行后续步骤之前,请确保作业的状态为“已完成”。
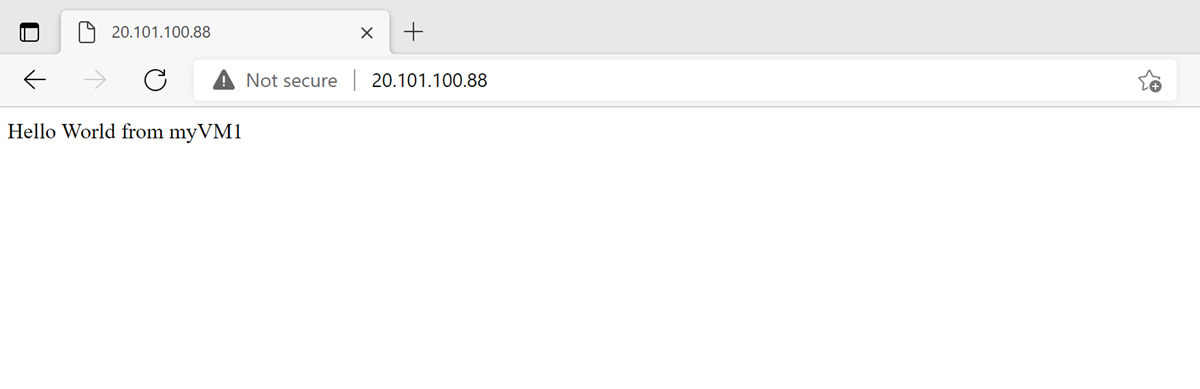
测试负载均衡器
使用 Get-AzPublicIpAddress 获取负载均衡器的公共 IP 地址:
$ip = @{
    ResourceGroupName = $rg.name
    Name = 'myPublicIP'
}
Get-AzPublicIPAddress @ip | select IpAddress
复制该公共 IP 地址,并将其粘贴到浏览器的地址栏。 IIS Web 服务器的默认页会显示在浏览器上。
清理资源
如果不再需要资源组、负载均衡器和剩余资源,可以使用 Remove-AzResourceGroup 命令将其删除。
Remove-AzResourceGroup -Name $rg.name
后续步骤
在本快速入门中,请执行以下操作:
已创建了一个 Azure 负载均衡器
将两个 VM 附加到负载均衡器
测试了负载均衡器
若要详细了解 Azure 负载均衡器,请继续学习: