Note
Access to this page requires authorization. You can try signing in or changing directories.
Access to this page requires authorization. You can try changing directories.
Important
Azure Disk Encryption is scheduled for retirement on September 15, 2028. Until that date, you can continue to use Azure Disk Encryption without disruption. On September 15, 2028, ADE-enabled workloads will continue to run, but encrypted disks will fail to unlock after VM reboots, resulting in service disruption.
Use encryption at host for new VMs. All ADE-enabled VMs (including backups) must migrate to encryption at host before the retirement date to avoid service disruption. See Migrate from Azure Disk Encryption to encryption at host for details.
Applies to: ✔️ Linux VMs ✔️ Flexible scale sets
Azure virtual machines (VMs) can be created through the Azure portal. The Azure portal is a browser-based user interface to create VMs and their associated resources. In this quickstart you'll use the Azure portal to deploy a Linux virtual machine (VM) running Ubuntu 18.04 LTS, create a key vault for the storage of encryption keys, and encrypt the VM. However, any ADE supported Linux image version could be used instead of an Ubuntu VM.
If you don't have an Azure subscription, create a Trial before you begin.
Sign in to Azure
Sign in to the Azure portal.
Create a virtual machine
Choose Create a resource in the upper left corner of the Azure portal.
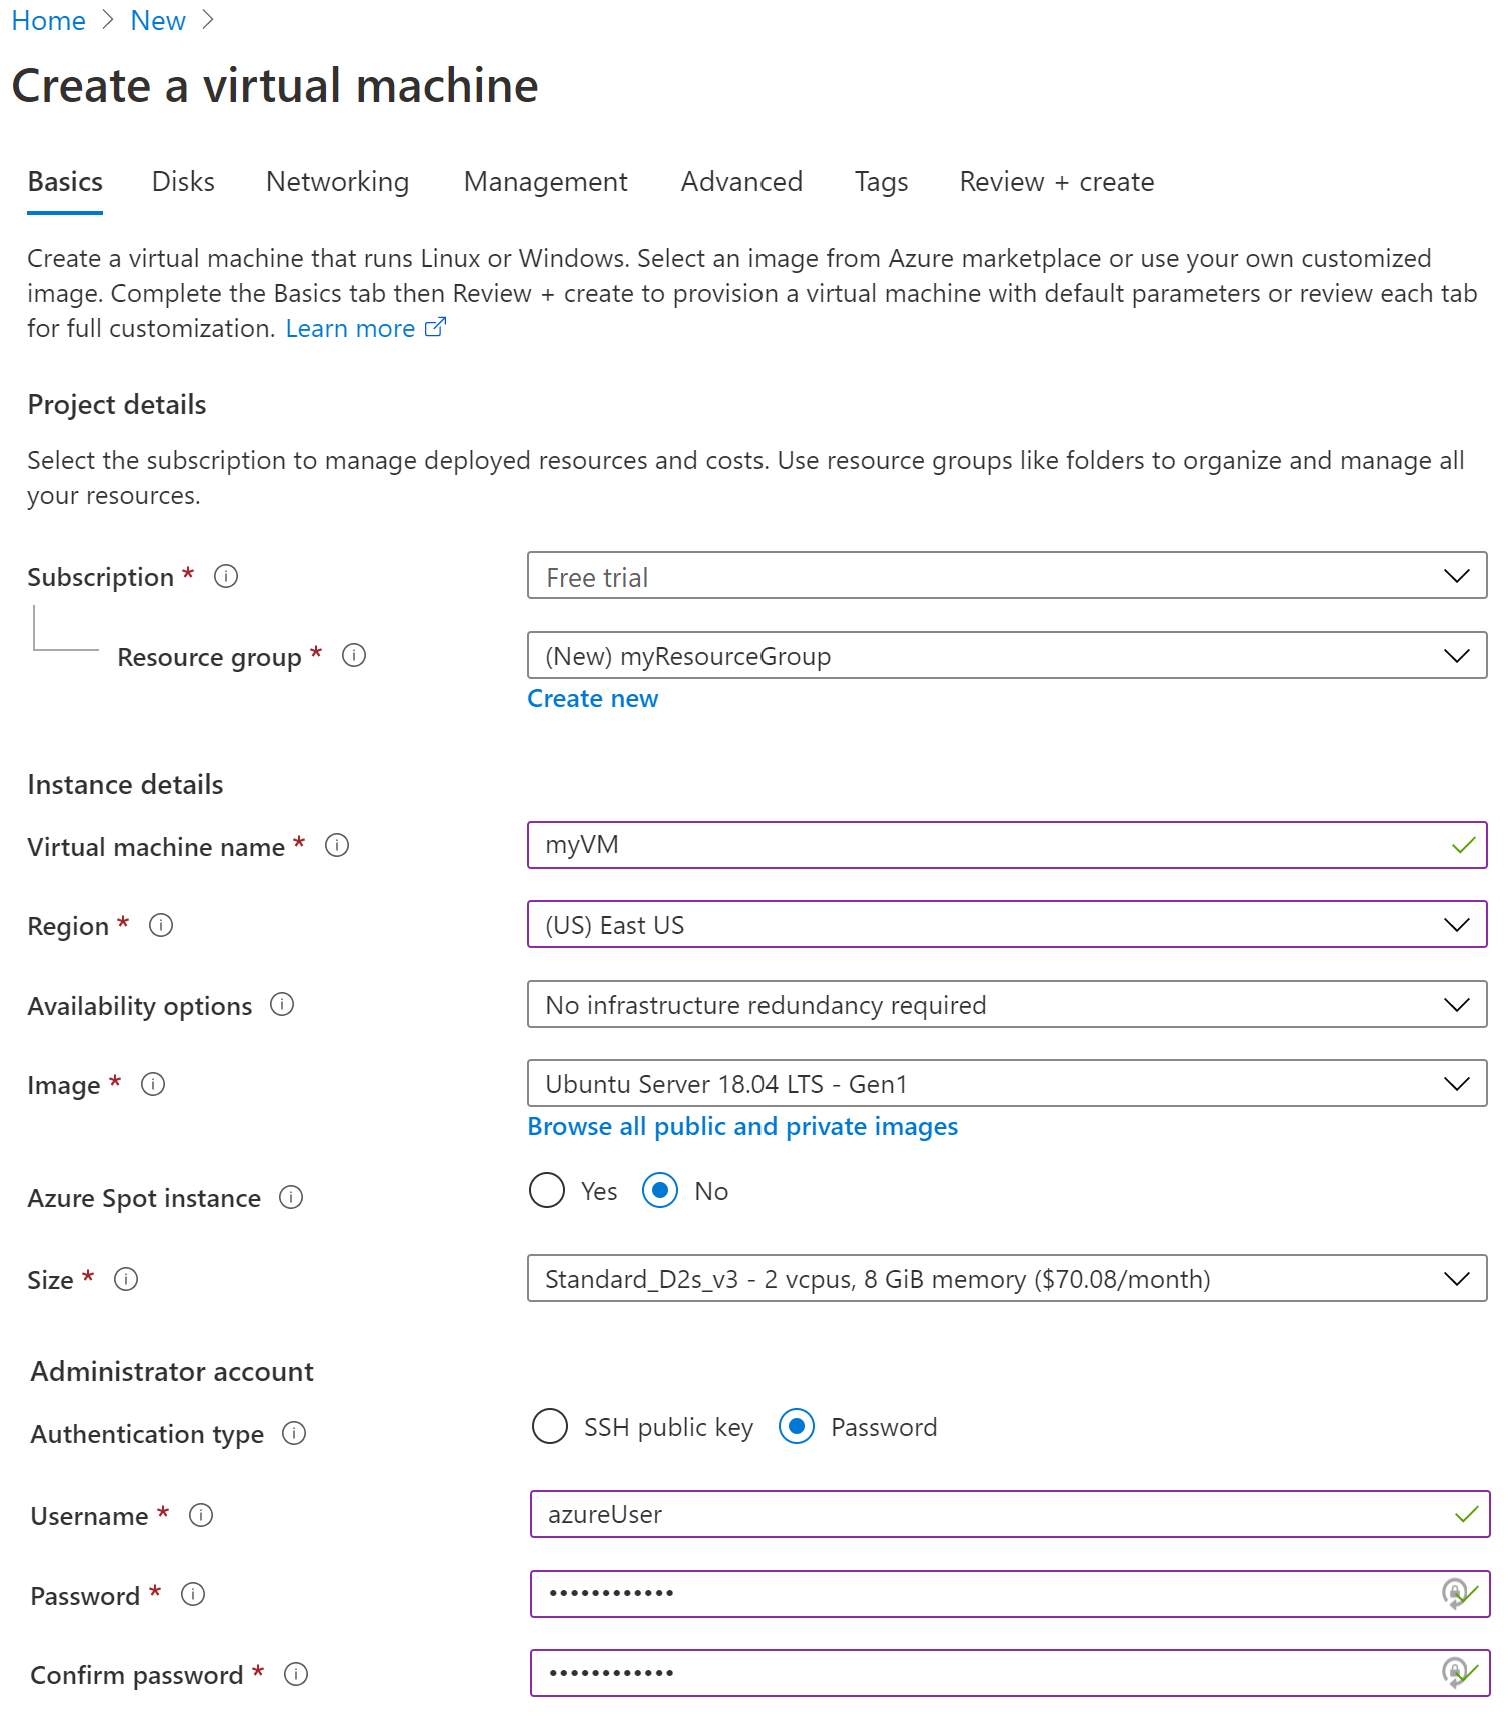
In the New page, under Popular, select Ubuntu Server 18.04 LTS.
In the Basics tab, under Project details, verify sure the correct subscription is selected.
For "Resource Group", select Create new. Enter myResourceGroup as the name and select Ok.
For Virtual machine name, enter MyVM.
For Region, select (Asia Pacific) China North 2.
Make sure the Size is Standard D2s v3.
Under Administrator account, select Password as the Authentication type. Enter a user name and a password.

Warning
The "Disks" tab features an "Encryption Type" field under Disk options. This field is used to specify encryption options for Managed Disks + CMK, not for Azure Disk Encryption.
To avoid confusion, we suggest you skip the Disks tab entirely while completing this tutorial.
Select the "Monitoring" tab and verify that you have a Diagnostics Storage Account. If you have no storage accounts, select Create New, name your storage account myStorageAccount, and select "Ok"
Select "Review + Create".
On the Create a virtual machine page, you can see the details about the VM you are about to create. When you are ready, select Create.
It takes a few minutes for your VM to be deployed. When the deployment is finished, move on to the next section.
Encrypt the virtual machine
When the VM deployment is complete, select Go to resource.
On the left-hand sidebar, select Disks.
On the top bar, select Additional Settings .
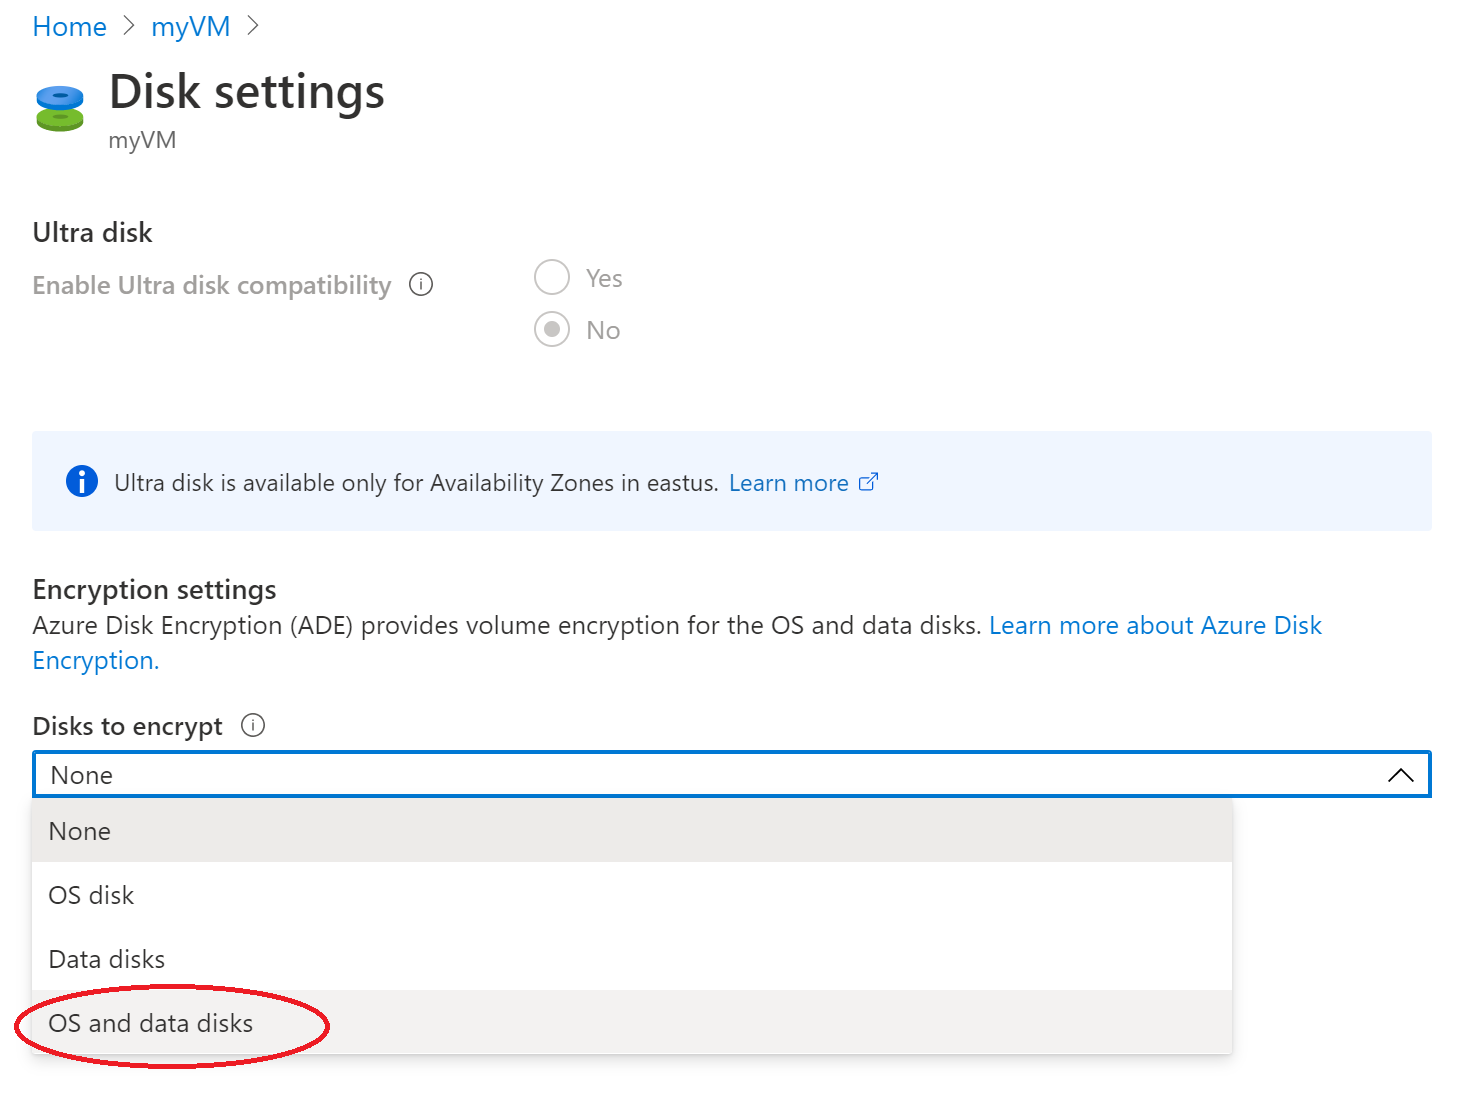
Under Encryption settings > Disks to encrypt, select OS and data disks.

Under Encryption settings, choose Select a key vault and key for encryption.
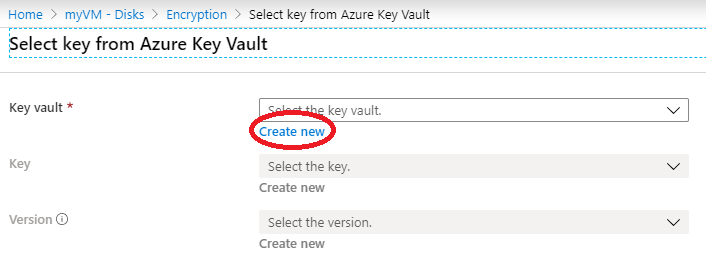
On the Select key from Azure Key Vault screen, select Create New.

To the left of Key vault and key, select Click to select a key.
On the Select key from Azure Key Vault, under the Key Vault field, select Create new.
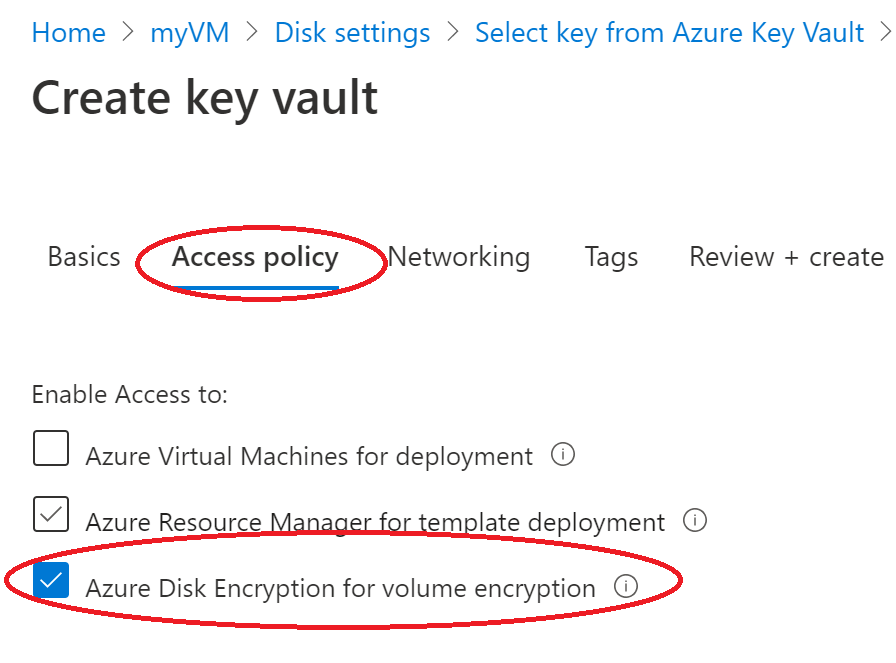
On the Create key vault screen, ensure that the Resource Group is myResourceGroup, and give your key vault a name. Every key vault across Azure must have a unique name.
On the Access Policies tab, check the Azure Disk Encryption for volume encryption box.

Select Review + create.
After the key vault passes validation, select Create. This returns you to the Select key from Azure Key Vault screen.
Leave the Key field blank and choose Select.
At the top of the encryption screen, click Save. A popup will warn you that the VM will reboot. Select Yes.
Clean up resources
When no longer needed, you can delete the resource group, virtual machine, and all related resources. To do so, select the resource group for the virtual machine, select Delete, then confirm the name of the resource group to delete.
Next steps
In this quickstart, you created a Key Vault that was enabled for encryption keys, created a virtual machine, and enabled the virtual machine for encryption.